To use a band saw, first set the blade tension and align the guide bearings for accurate cutting. Then, securely hold the workpiece, maintaining a steady feed rate and observing safety measures to achieve precise cuts.
Key Takeaways:
- Band saws are versatile tools for cutting a variety of materials and shapes
- Proper setup and maintenance are essential for safe and accurate cuts
- Learn basic and advanced cutting techniques to expand your woodworking repertoire
- Troubleshooting common issues can help extend the life of your band saw
- Incorporate tips and tricks from the pros to improve your woodworking skills
Introduction to Band Saws and Their Uses
Band saws are versatile power tools that are widely used for their ability to make precise cuts in a variety of materials, including wood, metal, and plastic. These tools feature a continuous loop of metal teeth called a blade, which is wrapped around two or more wheels and powered by an electric motor.
“A band saw is an indispensable addition to any workshop, providing unmatched precision and versatility for woodworkers, metalworkers, and DIY enthusiasts alike.“
Band saws have become a staple in woodworking, metalworking, and lumbering industries due to their capacity for making intricate cuts, resawing wood, and cutting curves with ease. Some of the most common applications for band saws are:
- Crafting curves and irregular shapes in wood and metal
- Resawing wood to create thinner slabs or veneers
- Cutting tenons, dovetails, and other joinery techniques
- Designing and executing intricate patterns in wood, metal, or plastic
To fully harness the power and capabilities of a band saw, it is essential to understand its various uses and learn how to set it up and maintain it properly for optimal performance.
Setting Up Your Band Saw for Safe and Accurate Cuts
Proper setup is key to ensuring both safety and accuracy when using a band saw. Taking the time to set up your band saw correctly will help prevent accidents and deliver precise cuts every time.
“The success of your band saw projects begins with a well-tuned and safely set up machine.“
To set up your band saw, follow these steps:
- Inspect the blade – Check the blade for any signs of damage, such as broken or missing teeth. Replace a damaged blade immediately.
- Install the blade – Ensure the blade is properly installed, seated on the wheels, and tracking correctly. The teeth should point downward and toward the front of the saw.
- Adjust blade tension – Adjust the tension of the blade according to the manufacturer’s recommendations or by using a tension gauge. A properly tensioned blade should not deflect more than 1/4 inch when pressed with moderate force.
- Set blade guides – Adjust the upper and lower blade guides so they are close to the blade without touching it. This helps keep the blade stable and reduces the chance of blade deflection.
- Adjust the table – Ensure the table is level and square to the blade. Use a square or other measuring tool to verify alignment.
- Set up the fence – Align the fence parallel to the blade for straight cuts. Make sure it is securely locked in place before starting a cut.
- Test the saw – Perform a test cut on a scrap piece of material to check the accuracy and performance of your band saw.
Always follow safety guidelines when operating a band saw, such as wearing eye protection, using push sticks or featherboards, and keeping a clean work area.
Table 1: Band Saw Setup Steps
| Step | Task |
|---|---|
| 1. | Inspect the blade |
| 2. | Install the blade |
| 3. | Set blade tension |
| 4. | Adjust blade guides |
| 5. | Set table angle (if required) |
| 6. | Check and adjust fence alignment (if used) |
Table: Essential steps for setting up a band saw for safe and accurate cuts.
Basic Band Saw Cutting Techniques
Master the fundamental band saw cutting techniques to improve your woodworking skills and ensure clean, accurate cuts.
When starting with a band saw, it’s crucial to learn the basic cutting techniques. These techniques will help you achieve precise and clean cuts, making your woodworking projects more professional-looking. Below are the essential steps to follow:
- Choose the right blade: Select a blade suitable for the material and type of cut you’re making. For general-purpose cutting, a 1/4-inch, 6-8 TPI (teeth per inch) blade works well. For more delicate cuts or tight curves, use a narrower blade with more TPI.
- Mark your cut line: Use a pencil to draw the line you’ll follow while cutting. This ensures accuracy and helps you maintain control of the cut.
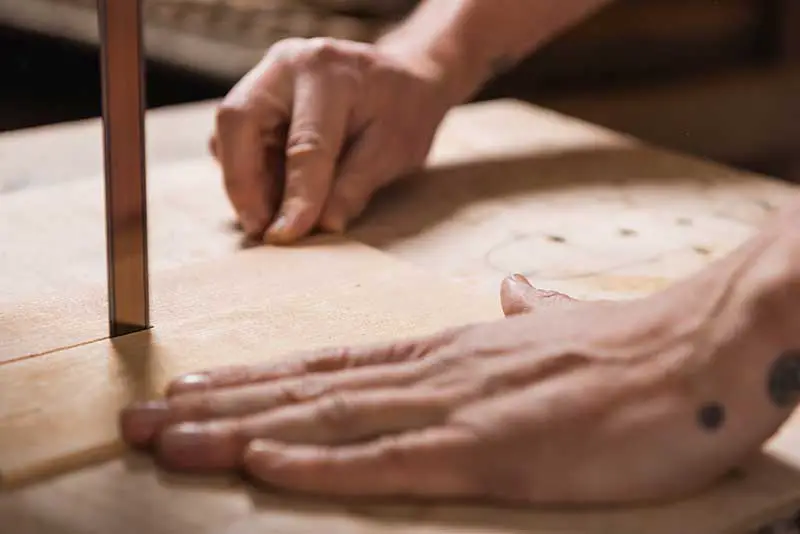
- Position your hands: Place one hand on the material near the cut line, but not too close to the blade, to guide the workpiece. Use your other hand to apply gentle pressure to the workpiece, keeping it flat against the table.
- Start the cut: Turn on the band saw and let it reach full speed before beginning the cut. Gently guide the workpiece along the cut line, maintaining a steady pace.
- Maintain control: Keep a firm grip on the workpiece while cutting, but don’t force it through the blade. Allow the saw to do the work and adjust your feed rate as necessary.
“Always remember to choose the right blade and maintain control of the workpiece for precise and clean cuts.”
As you become more comfortable with these basic techniques, you can experiment with more advanced cuts, like resawing and bevel cutting. Practice makes perfect, so take your time and keep safety in mind at all times.
Remember to practice safety and always use the appropriate personal protective equipment, such as safety glasses and hearing protection.
Table 2: Basic Band Saw Cutting Techniques
| Step | Description |
|---|---|
| 1 | Choose the right blade for the material and type of cut |
| 2 | Mark your cut line with a pencil |
| 3 | Position your hands to guide the workpiece and apply pressure |
| 4 | Start the cut and let the saw reach full speed before cutting |
| 5 | Maintain control and don’t force the workpiece through the blade |
Use these basic techniques to ensure precise and clean cuts while using a band saw.
Advanced Band Saw Techniques and Projects
Unlock the full potential of your band saw by mastering these advanced techniques and taking on more complex projects.
A band saw can do much more than just straight cuts. By learning advanced techniques, you can create intricate designs and tackle more challenging projects. Here are some advanced band saw techniques that you can experiment with:
1. Resawing: Resawing involves cutting a board along its thickness, producing two thinner pieces. This technique can be used to create book-matched panels or veneers. Use a wide blade with low TPI (teeth per inch) for best results, and ensure that the board is properly supported throughout the cut.
2. Compound cutting: Compound cutting is a technique where you make two cuts on the same workpiece at different angles. To achieve this, you need to tilt the band saw table to the desired angle for the first cut, then reposition the workpiece and make the second cut at a different angle.
3. Creating dovetail joints: Dovetail joints are strong and attractive joinery options for woodworking projects. With careful planning and a suitable blade, you can cut dovetail joints using a band saw.
“Master advanced band saw techniques to expand your project possibilities and create more intricate designs.”
Table 3: Advanced Band Saw Techniques
| Technique | Application |
|---|---|
| Resawing | Creating book-matched panels, veneers, or thin boards |
| Compound cutting | Cutting workpieces at different angles for complex shapes |
| Dovetail joints | Creating strong and attractive joinery for boxes, drawers, and more |
Explore these advanced techniques to expand your woodworking skills and take on more ambitious projects with your band saw.
Remember to always follow safety precautions and practice your skills on scrap material before attempting advanced cuts on your actual project pieces.
Maintenance and Troubleshooting Common Issues
Regular maintenance and addressing common issues will ensure your band saw operates smoothly and safely.
Just like any other power tool, a band saw requires regular maintenance to keep it running smoothly and safely. Here are some essential maintenance tasks and tips to troubleshoot common issues:
- Blade tension and tracking: Check the blade tension regularly and adjust if necessary. Make sure the blade tracks correctly on the wheels.
- Blade sharpness: Replace or sharpen the blade when needed. Dull blades can cause poor cuts and put extra strain on the motor.
- Lubrication: Keep the moving parts of your band saw properly lubricated to ensure smooth operation and reduce wear. Consult your owner’s manual for the specific lubrication points and recommended lubricant.
- Cleaning: Regularly clean the band saw to remove sawdust and debris, paying close attention to the table surface, blade guides, and wheels.
- Motor and electrical components: Check for any signs of wear or damage to the motor and electrical components. If you notice any issues, consult a professional for repairs.
Table 4: Quick Summary of Band Saw Maintenance and Troubleshooting
| Maintenance Task | Troubleshooting Tips |
|---|---|
| Blade tension & tracking | Check regularly, adjust if needed |
| Blade sharpness | Replace or sharpen dull blades |
| Lubrication | Lubricate moving parts, follow owner’s manual |
| Cleaning | Clean sawdust and debris regularly |
| Motor & electrical | Check for wear/damage, consult professional if needed |
“Regular maintenance and addressing common issues will help extend the life of your band saw and ensure it operates safely and efficiently.”
If you encounter any problems with your band saw, refer to the owner’s manual for troubleshooting tips or consult a professional for assistance.
Remember to always unplug the band saw before performing any maintenance tasks to prevent accidents.
Band Saw Tips and Tricks from the Pros
The pros have plenty of valuable tips for using a band saw efficiently and effectively. By incorporating these expert suggestions, you can take your woodworking projects to the next level.
When it comes to using a band saw like a pro, there’s no better source of knowledge than the experts themselves. Here are some tried-and-true tips and tricks from professional woodworkers to help you make the most of your band saw:
- Choose the right blade for the job: Different blades are designed for different types of cuts and materials. Make sure you select the appropriate blade for the task at hand.
- Make relief cuts: When cutting intricate shapes or curves, make relief cuts to reduce stress on the blade and prevent binding.
- Use a zero-clearance insert: This reduces tear-out and provides additional support for the workpiece, ensuring cleaner cuts.
- Keep the table clean and smooth: A clean, smooth table surface ensures that your workpiece glides easily and reduces the risk of inaccuracies.
- Practice, practice, practice: As with any skill, practice is key to mastering band saw techniques. The more you use your saw, the more comfortable and proficient you’ll become.
Table 5: Expert Band Saw Tips and Tricks
| Tip | Description |
|---|---|
| Choose the right blade | Select a blade based on the material and type of cut |
| Make relief cuts | Reduces stress on the blade, prevents binding |
| Use a zero-clearance insert | Reduces tear-out, provides additional support |
| Keep the table clean | Ensures smooth workpiece movement, reduces inaccuracies |
| Practice | Improves comfort and proficiency with the band saw |
Essential tips and tricks from professional woodworkers to improve your band saw skills.
Conclusion
Band saws are powerful tools that can take your woodworking projects to new heights. By understanding their uses, setting them up correctly, and mastering cutting techniques, you can make the most of your band saw’s capabilities. Remember to maintain and troubleshoot your saw to keep it in peak condition and always be on the lookout for expert tips and tricks to refine your skills. With practice and patience, you’ll be able to tackle any woodworking project with confidence and ease.