Key Takeaways
- Measuring a band saw blade involves finding the length, width, and tooth pitch, which can be done using a tape measure, ruler, or caliper.
- Folding and storing bandsaw blades properly prevents damage and increases their lifespan.
- Sharpening your band saw blades can be done using a specialized sharpening tool or a Dremel tool with a grinding attachment.
- Selecting the right blade for your project depends on the material, desired finish, and type of cut, considering factors like blade width, tooth style, tooth pitch, and blade material.
- Changing a horizontal band saw blade requires careful attention to safety and proper alignment of the blade on the wheels and guides.
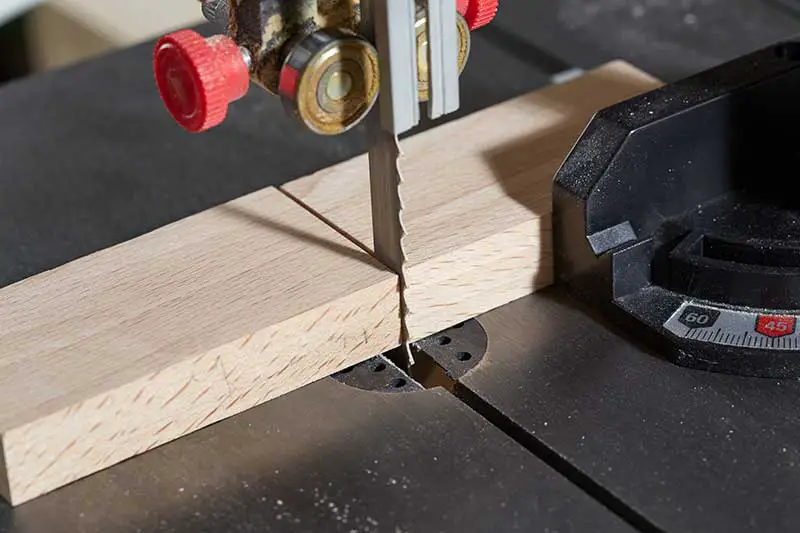
How to Measure Band Saw Blades
Measuring a band saw blade is essential for ensuring compatibility with your saw and optimal cutting performance. The key measurements include length, width, and tooth pitch.
To measure a band saw blade accurately, follow these detailed steps:
- Length: Uncoil the blade and lay it flat on the ground. Using a tape measure or a ruler, measure the total length from one end to the other. It’s important to measure a straight line along the center of the blade to get an accurate reading. This length determines whether the blade will fit your saw correctly.
- Width: Measure the width of the blade from one edge to the other at its widest point. The blade’s width affects the saw’s cutting capacity and the ability to make straight or curved cuts. Wider blades are better for straight cuts, while narrower blades allow for tighter curves.
- Tooth pitch: Count the number of teeth within an inch of the blade and note the distance between them. This is the tooth pitch, which directly impacts the cutting speed and finish. A finer tooth pitch is suitable for cutting thin materials and producing a smoother finish, while a coarser tooth pitch is ideal for cutting thicker materials at a faster rate.
Table 1: Band Saw Blade Measurements and Their Impact on Cutting Performance
| Measurement | Description | Impact on Cutting Performance |
|---|---|---|
| Length | Total length from end to end | Determines compatibility with specific band saw models; affects tension and tracking |
| Width | Distance from one edge to the other | Influences cutting stability, minimum radius, and straightness of cuts |
| Thickness | Thickness of the blade material | Affects strength, rigidity, and durability of the blade |
| TPI | Number of teeth per inch | Impacts cutting speed, finish quality, and required feed rate |
Caption: Key measurements of band saw blades and how they affect cutting performance.
Remember, selecting the right blade size and tooth pitch is crucial for optimal cutting performance and ensuring your safety.
When measuring, make sure to carefully handle the blade to avoid injury. Always wear protective gloves and take precautions to prevent the blade from snapping back.
How to Fold and Store Bandsaw Blades
Folding and storing your bandsaw blades properly is essential for safety and prolonging blade life. Follow these steps to fold and store your bandsaw blades correctly.
- Put on safety gloves and goggles to protect your hands and eyes from the sharp teeth of the blade.
- Hold the blade with both hands, positioning your hands at the 3 o’clock and 9 o’clock positions, with the teeth facing away from you.
- Twist one hand toward you and the other hand away from you, creating a loop with the blade. The teeth should be on the inside of the loop.
- Bring the two loops together, creating a third loop in the middle. Make sure the blade’s teeth are on the inside of all three loops.
- Gently shake the folded blade to align the loops evenly.
- Secure the folded blade with a zip tie or a piece of string to prevent it from accidentally unfolding.
- Store the folded blade in a safe, dry location, away from humidity and extreme temperature changes.
“Properly folding and storing your bandsaw blades helps ensure safety and extends the lifespan of your blades.”
Table 2: Steps for Folding and Storing Bandsaw Blades
| Step | Description |
|---|---|
| 1 | Put on safety gloves and goggles |
| 2 | Hold the blade at 3 o’clock and 9 o’clock positions |
| 3 | Twist hands to create a loop |
| 4 | Bring loops together to create a third loop |
| 5 | Shake folded blade to align loops evenly |
| 6 | Secure folded blade with a zip tie or string |
| 7 | Store blade in a safe, dry location |
Follow these steps to properly fold and store your bandsaw blades.
Remember to unfold the blade carefully when you’re ready to use it again, making sure to keep the teeth facing away from you.
How to Sharpen Band Saw Blades
To sharpen band saw blades, clamp the blade securely and use a suitable file or sharpening stone to hone the teeth. Regular sharpening improves cutting accuracy and extends blade life.
Sharpening your band saw blades is a crucial part of maintaining your saw’s performance. Dull blades can cause inaccurate cuts and put unnecessary strain on your machine. Follow these steps to sharpen your band saw blades:
- Disconnect the saw from the power source: Safety first. Always unplug your band saw before performing any maintenance tasks.
- Remove the blade: Carefully release the tension on the blade and remove it from the band saw’s wheels. Keep track of how the blade is threaded through the guides for reassembly later.
- Secure the blade: Clamp the blade securely in a vise or to your workbench, ensuring that the teeth are facing upwards and accessible for sharpening.
- Choose the appropriate sharpening tool: Use a round or triangular file, or a diamond sharpening stone that matches the size and shape of your blade’s teeth.
- Sharpen each tooth: Hold the file or sharpening stone at the same angle as the tooth’s original bevel. Gently stroke the tool along the tooth’s front edge, maintaining consistent pressure and angle. Repeat this process for each tooth.
- Inspect the blade: Check the blade for any damaged or unevenly sharpened teeth, and touch up as necessary.
- Reassemble the band saw: Thread the sharpened blade back through the guides, place it onto the wheels, and adjust the tension according to your saw’s specifications. Reconnect the power source.
“Regular sharpening not only improves cutting accuracy but also extends the life of your band saw blades.”
Table 3: Summary of Steps to Sharpen Band Saw Blades
| Step | Description |
|---|---|
| 1 | Disconnect the saw from the power source |
| 2 | Remove the blade |
| 3 | Secure the blade |
| 4 | Choose the appropriate sharpening tool |
| 5 | Sharpen each tooth |
| 6 | Inspect the blade |
| 7 | Reassemble the band saw |
This table provides a quick overview of the steps to sharpen band saw blades.
Selecting the Right Blade for Your Project
Selecting the right band saw blade depends on the material you’re cutting and the desired cut quality. Consider factors like blade width, tooth pitch, and tooth style when choosing a blade.
Selecting the right blade for your project is essential for efficient cutting and achieving the desired results. Here are some factors to consider when choosing a band saw blade:
- Blade width: Blade width affects the minimum cutting radius and overall blade stability. Wider blades are ideal for straight cuts, while narrower blades work best for intricate curves.
- Tooth pitch: Tooth pitch refers to the distance between teeth and affects cutting speed and finish quality. A higher tooth pitch cuts faster but produces a rougher finish, while a lower tooth pitch cuts slower but yields a smoother finish.
- Tooth style: Tooth styles, such as regular, hook, and skip, influence the blade’s cutting characteristics. Regular teeth are versatile and suitable for most materials, hook teeth are ideal for cutting thicker materials, and skip teeth work well for softer materials.
- Tooth material: The material of the teeth, such as high-speed steel (HSS) or carbide, affects cutting performance and blade durability. Carbide-tipped blades are more durable and suitable for harder materials but are more expensive than HSS blades.
“Choosing the right blade for your project ensures efficient cutting and optimal results.”
Table 4: Band Saw Blade Selection Factors
| Factor | Considerations |
|---|---|
| Blade width | Wider blades for straight cuts, narrower blades for intricate curves |
| Tooth pitch | Higher pitch for faster cutting and rougher finish, lower pitch for slower cutting and smoother finish |
| Tooth style | Regular teeth for versatility, hook teeth for thicker materials, skip teeth for softer materials |
| Tooth material | HSS for affordability and general use, carbide for durability and harder materials |
This table summarizes the factors to consider when selecting a band saw blade for your project.
How to Change a Horizontal Band Saw Blade
Changing a horizontal band saw blade is a simple process that involves removing the old blade, installing the new blade, and tensioning it properly. Always ensure the saw is unplugged before attempting to change the blade.
Follow these steps to change a horizontal band saw blade:
- Disconnect power: Unplug the band saw or switch off the power supply to ensure safety while changing the blade.
- Open the blade guard: Locate and open the blade guard on both the upper and lower wheels to expose the blade.
- Release blade tension: Find the tension adjustment knob or lever, usually located near the upper wheel, and release the tension on the blade.
- Remove the old blade: Carefully remove the old blade by sliding it off the upper and lower wheels. If necessary, use gloves to protect your hands from sharp edges.
- Clean the wheels and blade guides: Before installing the new blade, clean the upper and lower wheels and blade guides to remove any dust or debris.
- Install the new blade: Slide the new blade onto the upper and lower wheels, ensuring the teeth are facing in the correct direction for cutting.
- Adjust the blade guides: Position the blade guides close to the blade without touching it, ensuring it runs smoothly and stays straight during cutting.
- Tension the blade: Turn the tension adjustment knob or lever to apply tension to the blade. Check the tension by pressing the blade gently with your finger; it should not deflect more than 1/4 inch.
- Test the saw: Plug in the saw and turn it on, allowing the blade to run for a few seconds to ensure proper installation and alignment.
“A well-installed blade ensures smooth operation and accurate cuts with your horizontal band saw.”
Table 5: Horizontal Band Saw Blade Changing Steps
| Step | Description |
|---|---|
| 1 | Disconnect power |
| 2 | Open the blade guard |
| 3 | Release blade tension |
| 4 | Remove the old blade |
| 5 | Clean the wheels and blade guides |
| 6 | Install the new blade |
| 7 | Adjust the blade guides |
| 8 | Tension the blade |
| 9 | Test the saw |
This table summarizes the steps to change a horizontal band saw blade.
What Are the Best Band Saw Blades?
The best band saw blades depend on the type of material you’re cutting and the desired finish. Premium blades from reputable manufacturers like Timber Wolf, Lenox, and Starrett offer durability, performance, and longevity.
To choose the best band saw blade for your needs, consider the following factors:
- Blade width: Wider blades are suitable for straight cuts and resawing, while narrower blades are ideal for curves and intricate shapes.
- Tooth style: Different tooth styles are designed for specific materials and cutting applications. Regular, skip, and hook tooth blades are the most common styles.
- Tooth pitch: Tooth pitch refers to the number of teeth per inch (TPI). A higher TPI results in smoother cuts but slower cutting speed, while a lower TPI offers faster cutting speed but rougher cuts.
- Blade material: The most common blade materials are carbon steel, bi-metal, and carbide-tipped. Carbon steel is economical but less durable, bi-metal blades offer a balance of durability and cost, and carbide-tipped blades provide the longest life and best performance but are more expensive.
“Investing in high-quality band saw blades from reputable manufacturers can improve cutting performance and extend the life of your blades.”
Table 6: Factors to Consider When Choosing the Best Band Saw Blade
| Factor | Description |
|---|---|
| Blade width | Wider blades for straight cuts and resawing, narrower blades for curves and intricate shapes |
| Tooth style | Regular, skip, and hook tooth blades for different materials and cutting applications |
| Tooth pitch | Higher TPI for smoother cuts and slower cutting speed, lower TPI for faster cutting speed and rougher cuts |
| Blade material | Carbon steel for economy but less durability, bi-metal for balance of durability and cost, carbide-tipped for longest life and best performance |
This table summarizes the factors to consider when choosing the best band saw blade for your needs.
Conclusion
Understanding how to measure, maintain, and select the right band saw blade for your needs is essential for efficient and accurate cutting. By following the steps and guidelines provided in this article, you can extend the life of your blades, improve your cutting performance, and ensure that you have the right blade for the job.