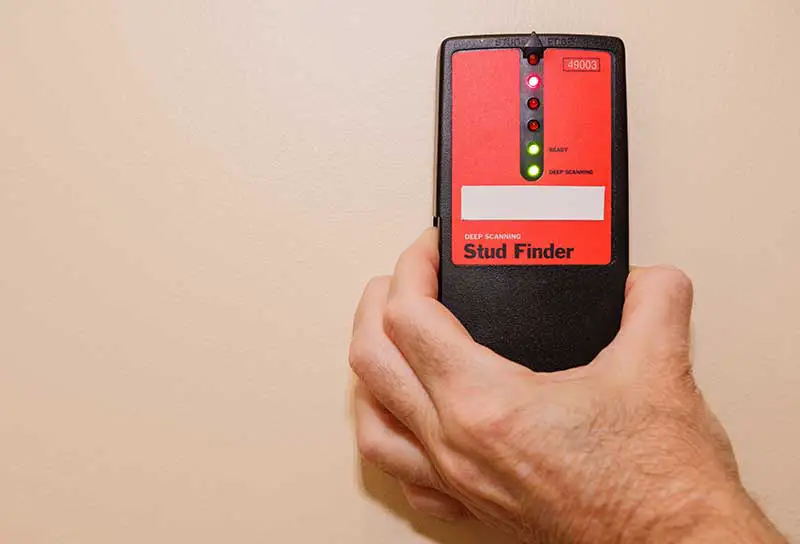
Why you’re your stud finder keeps saying AC?
The reason your stud finder keeps saying AC is because of an error with the calibration or there’s something unusual in the wall. Your stud finder malfunctioning or the battery is too weak is another reason your stud finder keeps saying AC.
Calibration Error
The inaccuracy in the calibration is the best explanation for your stud finder saying AC continuously. A difference in the measurements indicated by an instrument and the actual result is referred to as a calibration error. If your stud finder continues to say AC, you should begin inspecting your wall from a different location.
A weak battery
If your stud finder was functioning properly in the past but now says AC, the problem is almost certainly caused by a weak battery. You might be able to convince yourself that the battery has some life left in it, but it does not. Is the battery fresh from the store, or did you just find it in your drawer?
Many individuals are unaware that batteries lose their ability to work once their expiration date has passed, even if they have never been used, and that some batteries do not maintain their charge as effectively as other types of batteries. You need to change your battery when your stud finder doesn’t stop saying AC.
Something unusual in the wall
When you are using your stud finder, it will keep saying AC if it finds something strange in the wall. This means it doesn’t know how to accurately access the object in the wall.
How to fix a stud finder that keeps saying AC?
You can fix your stud finder that keeps saying AC by scanning the stud finder, changing your battery, and fixing the calibration error.
Scan your stud finder
Scanning your stud finder will help you stop it from saying AC. You can follow these steps to scan your stud finder.
- To begin the scanning process, lean the tool against the wall, then push and maintain pressure on the button.
- The density of the space behind the wall is what stud finders use to determine their location. The density is higher over the stud than in the surrounding area, which is further away from the stud.
- When you turn on your stud finder, it will immediately calibrate itself to the wall you inspect.
- Suppose you accidentally hit the calibration button before placing the stud finder on the wall. In that case, the device will calibrate itself to the density of thin air rather than the density of your wall.
Change your battery
Ensure the batteries in your stud finder are up to date and working properly; inaccurate readings can be caused by low-quality batteries. Here are steps to follow to change your battery.
- Check your old battery to see if it’s old or not working again
- If it’s old, you can change it to a new one
Also, make sure that the flat side of the stud finder is clear of any debris and dust.
Fixing the calibration error
You need to find a solution to your calibration error if you want your stud finder to stop saying AC. To solve the calibration error in your stud finder, do the following:
- Flatten the device against the wall’s surface
- Press and hold the power button, and monitor the display for one to two seconds.
- The instrument automatically adjusts its calibration to the surface of the wall.
- The tool will make a beeping sound, and the lights will flash if there is a problem with the calibration or if you have started more than one stud at the same time.
- Please remove your finger from the Power button, shift the tool to the left or right by a few inches, and start the calibration process again.
Why your stud finder detects wires on the entire wall?
Your stud finder detects wires on the entire wall because of high moisture levels in the substrate, which triggers the wrong reading or high sensitivity on the affected by the metal. Weak batteries that make readings inaccurate are other reasons your stud finder detects wires on the entire wall.
High moisture in the substrate
If there’s high moisture in the substrate you are working on, your stud finder will keep detecting wires on the entire wall. You will have to clean it off to continue using your stud finder.
A weak battery
If your stud finder just starts detecting wires on the entire wall, the issue is a weak battery. It might be that your battery has expired or been overused. The expiry date can be found in a different spot on each individual battery. There is a printed use-by date on each of these batteries.
High sensitivity
The finder’s sensitivity is determined by the electric field, which determines the distance between you and the wires and the means by which you are connecting to them. The amount of current in the wire and the paint on the wall may determine the thickness of the page that is placed in between.
The typical technique involves turning on the device, adjusting the level of sensitivity in free air until the detector emits a tone, and then turning the button in the other direction until it shuts off. The iron that is on the other side of the plasterboard or drywall could have an effect on the sensitivity. Therefore, you might need to turn the sensitivity down even further.
How to fix a stud finder that detects wires on the entire wall?
You can fix a stud finder that detects wires on the entire wall by adjusting the live wire detector’s sensitivity or changing your stud finder’s battery.
Adjust the sensitivity
If the sensitivity in your stud finder is high, it won’t give you a good reading in a specific place. So, it is essential to adjust the sensitivity in a neutral position. Here is how to adjust it;
- Turn on the stud finder
- Ensure it is in free air
- Adjust the sensitivity up until the detector emits a tone
- Then turn it off for a few minutes before turning it on again
Change the battery
A weak battery can cause your stud finder to start misbehaving, which can lead to the stud finder detecting wires on the entire wall in your building. Changing your battery is an easy fix that you can do to avoid this problem. Here is how to change your battery;
- Find the battery cover on the back cover of the stud finder.
- Use a screwdriver to remove the cover.
- Once the cover is off, remove the old battery.
- Then insert the new one after you have removed the lid.
- Ensure positive and negative are facing the correct directions.
- Place back the battery cover.
- Screw it back on. You can start using your stud finder again!
Most stud finders feature a sensitivity adjustment that, before the operation, needs to be properly calibrated by the instruction manual. Indications will be incorrect if this step is skipped and left out. If you followed the manual’s directions while adjusting, but you are still getting the same outcome, the device most likely broken.
Why your Stanley stud finder AC keeps beeping/light on?
The reason your Stanley stud finder AC keeps beeping is because there is something strange in the wall, or your Stanley stud finder is not functioning well. High sensitivity in your stud finder is another reason your stud finder keeps beeping.
Here are steps to fix your Stanley stud finder AC that keeps the light on.
- Check the battery in your stud finder. If it’s old, try and replace it.
- Try and scan your stud finder to see if it’s still functioning; if not, repair the spoilt parts.
- See if your wall has something strange that’s making your stud finder beep continuously.
When Stanley stud finders detect AC cables behind the wall, the device may emit an audible beep. If you want to avoid hearing this beeping sound repeatedly, there are some precautions you need to take. Before you turn on the device by pushing the power button, you must ensure that the tool is correctly calibrated to the surface.
The stud finder will continue to sound an alarm if there is even the slightest variation in the dielectric constant of the wall. Failure to work properly is still another potential explanation for the beeping. In this scenario, the power is erratic, but the stud finder continues to sound its alarm.
Why your Dewalt stud finder AC keeps beeping/light on?
The reason your Dewalt stud finder AC keeps beeping is because there is an error in calibration or a bad battery that won’t allow accuracy. Old plaster walls with lath boards are another reason your Dewalt stud finder keeps light on.
One of the most common explanations for its beeping sound is a stud finder that needs to be calibrated.
- To calibrate your stud finder, you can simply try restarting your pass on the wall to see if you can get a better reading without beeping.
- You can try increasing the sensitivity of the stud finder by placing it on the wall and turning the sensitivity dial in the opposite direction until the device beeps no longer.
- Then, move it back and forth in an arc that is sufficiently large to ensure that you have crossed a stud, and gradually increase the sensitivity until you hear a tone whenever you cross a stud.
- After this, you can stop.
- Some stud finders can detect current and can make an audible beeping sound to notify the user of the presence of live wires behind drywall.
Why your Ryobi stud finder AC keeps beeping/light on?
The reason your Ryobi Stud finder keeps beeping is because your stud finder has detected voltage or it needs to be recalibrated.
To fix your Ryobi stud finder from this problem, follow these steps.
- Place your Ryobi stud finder against the wall.
- Press and hold the power button for a few seconds.
- It will automatically calibrate to the wall’s surface.
It is also important to note that in their product description, Ryobi only discusses the detector’s capacity to locate studs under the drywall. Even while they don’t directly rule out the use of alternative materials, it’s obvious that they had drywall in mind when designing it. There is a problem with the tool’s calibration if it continues to blink and beep repeatedly. You may try scanning the wall again, but this time begin in a different spot.