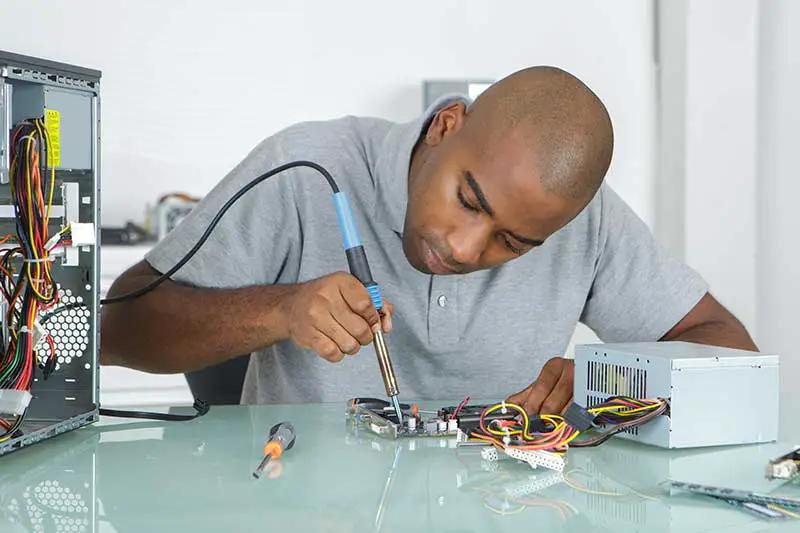
Why your soldering iron is not heating up?
Your soldering iron is not heating up due to a broken circuit inside the iron. Once the circuit is broken, the electricity in the soldering iron will not work effectively. A physically damaged ceramic heater or a damaged heating element is another reason your soldering iron is not heating up.
Broken circuit
If a circuit is broken in your soldering iron, the electricity flow will be affected, and this will make your soldering iron receive less heat. You can conduct a continuity test to determine the cause of the broken circuit. Also, since electrical connections can become loose over time, it is important to inspect them as you dismantle the soldering iron.
Damaged ceramic heater
If your soldering iron isn’t heating up, the problem could be with the ceramic heater. It is natural for ceramics to change color over time. However, if the rod is missing, it’s likely because the ceramic heater broke off, and its fragments may still be stuck at the end of the tip.
The best way to check if your ceramic heater is damaged is by looking for holes or fractures in the plating. If you notice any, you need to replace the ceramic heater to get your soldering iron to function effectively.
Damaged heating element
The tip of your soldering iron gets heated because the heating element transfers heat. If your heating element becomes damaged over time, the heat won’t be transferred to the soldering iron tip, which stops your soldering iron from heating up. The heating element must be replaced to fix the problem and get the soldering iron back to its normal working state. See below our simple DIY guide on how to replace a damaged heating element.
How to fix a soldering iron that is not heating up?
You can fix a soldering iron that isn’t heating up by replacing the damaged heating element or replacing the damaged ceramic heater.
Replace the damaged heating element
If your heating element is damaged, your soldering iron won’t heat up, and you need to replace it. Here is a simple guide on how to replace it;
- First, you need to unscrew your soldering iron’s handle by hand and pull the handle off the iron.
- Then take off the tape that is protecting the soldering iron assembly.
- After you take off the protective tape, you’ll see two connectors. Twist the ends of the connectors to separate the two wires from them.
- Next, use your wire cutters to cut off the two metal lugs next to the connectors.
- Throw away the metal hooks.
- Your soldering iron assembly has a nut at the end that you will turn counterclockwise with your spanner wrench.
- Finish unscrewing the nut by hand, then unscrew the ring on the end of your soldering iron.
- Grasp the heating element at the end of your soldering iron with your needle-nose pliers.
- Now, you can use your needle-nose pliers to pull the heating element out of the soldering iron.
- Take out the old heating element.
- Place the wire end of your new heating element into the soldering iron first.
- Then put the ring back on.
- You can separate the two leads of your replacement heating element with your fingers.
- Tighten the nut by hand, and then use the spanner wrench to finish the job.
- Don’t tighten the nut too much because your soldering iron naturally grows and shrinks as you use it.
- Put the leads of the heating element into the soldering iron’s connectors and wrap the connectors with the tape.
- Lastly, put the soldering iron’s handle back on.
Note: So that your soldering iron lasts as long as possible, keep the tip clean and free of dust and other debris.
Replace the damaged ceramic heater
A broken ceramic heater is one of the major reasons your soldering iron won’t heat up. You need to replace the ceramic heater once you notice any damage. Here is how to replace it;
- First, turn off the power and unplug the heating ring’s wire.
- After the soldering iron has been off for a while and the tip is cool to the touch, follow the instructions in the unit’s manual to remove the tip from the iron’s handle.
- Take off the back grille and the knobs.
- Unscrew the screws on the back of the housing to take off the front grille.
- Take the thermostat out of the control housing and unplug it.
- Remove the screws and clips that hold the heat control in place so you can get to the wires and disconnect them.
- Take off the clips, screws, and other parts to get to the heating element.
- To replace a broken ceramic heating element, disconnect the terminal leads on each side and lift the element out of its housing.
- Note where the element is so that it or a replacement can be put back in place with the least amount of work.
Why your soldering iron is not melting the solder?
The reason your soldering iron is not melting the solder is because the heat supply is not sufficient. An oxidized iron tip or a poor soldering technique is another reason your soldering iron isn’t melting the solder.
Insufficient heat supply
If your soldering iron does not supply the right amount of heat, your solder won’t melt. Solders are made to have a low melting point, so even a soldering iron with only 15 watts of power can be used to melt the solder used to connect small chips. However, a 15-watt soldering iron will not be able to melt the solder while working with larger connectors or wires that are substantially greater than 16 gauge.
You’ll need a soldering iron with a wattage of 25 to 30 watts, which is generally considered the sweet spot for hobby uses. Always ensure the wattage is adequate for the size of the soldering iron if it is not melting.
Oxidized soldering iron
Soldering iron tips are crucial because they generate the heat necessary to melt the solder, allowing it to flow into the gap between your workpieces. However, if the tip of your soldering iron becomes oxidized, it will not be able to transfer enough heat from the heat source to melt your solder. If your soldering iron isn’t getting hot enough, you need to check for oxidation and contaminants on the tip.
If your soldering iron has an oxidized layer on its tip, cleaning it off is the best fix.
Poor soldering technique
Whether or not your solder melts depend on your soldering technique. Before you can solder a joint, you must first apply solder to your soldering iron and let it set for a few seconds. If you let the solder rest on the soldering iron for too long, the flux will begin to boil, producing toxic vapors rather than lead.
Soldering would be extremely difficult without flux. The oxidized layer on the metal can be removed using a flux. It’s crucial because solder won’t cling to metal that has an oxidized layer, and metals tend to oxidize more quickly at soldering temperatures.
Proper soldering skills are essential if you want your solder to melt properly. In order to successfully solder a component, you will need to position your soldering iron so that its tip makes extensive contact with the part.
How to fix a soldering iron that is not melting the solder?
You can fix a soldering iron that isn’t melting the solder by cleaning the oxidized part. Using the proper technique or heating the soldering iron with sufficient heat is another method you can use to fix a soldering iron that isn’t melting the solder.
Clean oxidized part
When soldering, if the soldering iron tip oxidizes, it greatly affects how the solder will melt. When the iron tip is oxidized, the solder won’t melt. Here is how to fix it;
- First, heat the soldering iron to its normal temperature (300°C).
- Allow the solder point to ignite after coating it with colored flux.
- The high temperature of the tip initiates a chemical process that allows us to extract the oxidized product.
- It is advised that a thin layer of solder be applied to the tip. This approach protects the tip from the air and holds the solder together when the iron is heated.
Use proper technique
The best way to ensure that your soldering iron melts the solder well is to learn how to solder properly. Using the right technique will help you achieve great success when soldering. Here is a DIY step;
- The solder needs a clean surface on which to adhere.
- Heat the connection for a few seconds with the tip of the soldering iron, then add the solder.
- Keep the soldering tip on the connection as the solder is applied.
- As soon as the solder is where you want it, take the tip off the connection. First, take off the solder and then the iron.
- Don’t move the connection while the solder is setting.
- Don’t heat the connection too much because that could hurt the electrical part you’re soldering.
- It shouldn’t take more than a few seconds to solder a connection.
- Check the joint carefully.
- Use a damp sponge to clean the tip of the iron. Now, the point should be shiny.
- When you aren’t using the soldering iron, unplug it.
Heat the soldering iron with a sufficient amount of heat
You need to heat the soldering iron with the right amount to make your solder melt. Here is how to fix it;
- Leave the fitting attached to the soldering iron.
- For about 20 seconds, use direct heat from the propane torch to heat the joint.
- Touch the soldering wire to the joint when you believe it has achieved the proper temperature.
- The solder will melt and be drawn into the junction formed by the tubing and fitting.
- When you observe melted solder flowing and spilling out, you know it’s time to stop soldering.
Why solder won’t melt on a copper pipe?
Your solder won’t melt on a copper pipe because of filthy or corroded copper. The copper is not hot enough, or the solder is not hot enough, is another reason your solder won’t melt on a copper pipe.
Filthy or corroded copper
When it comes to electrical soldering, the copper pipe is just as important as the iron tip. When working with copper, dust can get on it and make it harder to melt. Instead, it will melt on the dust built up on the copper pipe instead of the copper pipe.
Before working on a copper pipe, you must ensure it is clean.
Copper isn’t hot enough
If the solder is hot and your copper pipe isn’t, your solder won’t melt on the copper. To solder, place the soldering iron tip against the melt and utilize the heat from the iron to melt the solder on top. If the copper’s surface temperature is not hot enough, the solder will not melt correctly on the copper pipe.
The solder isn’t hot enough
Just as your copper pipe must be hot enough, it’s also essential that your solder is hot enough to melt on the copper pipe. The temperature of the soldering iron must be high enough to melt the insulation on the joined copper pipe. The iron point won’t melt as quickly as it should if the solder can’t generate enough heat.