Why won’t my solder stick to metal?
The reason your solder won’t stick to metal is because of a dirty or oxidized part. The solder or the metal is not hot enough is another reason your solder won’t stick to the metal.
Dirt or oxidized part
If the metal you are working with is dirty or covered in rust, the solder won’t stick to it well. Instead of the solder sticking to the metal, it will stick to whatever is on it. This keeps it from sticking to the metal itself.
You need to ensure the metal you’re working on isn’t covered with dirt or rusty. And if it is, you need to clean the metal first before using it.
The soldering is not hot enough
For the soldering iron to reach the melting point and permanently join two metals, it must be heated to a high enough temperature. Insufficient heat will prevent the solder from melting the metal. Most time, this is because the soldering iron is set to the wrong temperature or its wattage is too low for the size of the solder you are using.
To troubleshoot this issue, you must ensure you set the right temperature before soldering.
The metal is not hot enough
When soldering, both the metal wire and the iron tip must be heated to extremely high temperatures. The soldering iron tip is placed against the melt, and the solder is melted by the resulting heat. If the metal’s surface isn’t hot enough, the solder won’t melt right or stick to the metal.
Even if the iron is hot enough to melt the solder, the solder won’t stick if the metal isn’t hot enough.
How to fix solder that won’t stick to metal?
You can fix a solder that won’t stick to metal by making the metal hot enough. Cleaning the oxidized metal or making the soldering hot enough is another way you can fix a solder that won’t stick to metal.
Make the metal hot
Soldering depends on the temperature. For metal to melt, it has to be hot enough. If not, it won’t stick properly. Here is how to fix it;
- Hold your soldering iron against the metal for a long time until it gets hot enough to melt the solder and stick to the metal.
- Depending on the metal you’re working with, you can heat the outside with a propane torch.
Clean oxidized metal
If the tip of the solder is oxidized by metals, it changes how well it sticks. Here is how to fix it;
- First, turn on the soldering iron and heat it to 300°C, which is its normal range.
- Put colored flux on the end of the solder and let it melt.
- The tip should have a thin layer of solder on it. This method keeps the tip from being exposed to air and keeps the solder together.
Make the solder hot
When soldering, both the metal wire and the iron tip must be heated to extremely high temperatures. The iron tip must be hot enough to melt the solder, and the wire must be hot enough to join securely. Here is how to fix it;
- Hold the soldering iron against the metal for a long time or until a high temperature is reached to get a strong bond.
- The exterior of the metal wire can be heated with a propane torch.
- Remember that the time needed varies depending on the size, temperature, and wattage of the iron used for soldering.
Why won’t my solder stick to the iron?
The reason your solder won’t stick to iron is because of a broken heating element. A technical flaw or a dirty iron is another reason your solder won’t stick to the iron.
Broken heating element
Broken heating elements prevent you from getting solder sticks to the iron. It’s the major reason your soldering isn’t sticking to the iron.
Technical flaw
A common cause of soldering problems is leaving the solder on the iron for too long before actually using it to bind the iron together. Once the solder is exposed to air, the tin in the flux layer degrades, reducing the solder’s ability to adhere to iron.
Dirt iron
Check to see if the tip of the soldering iron has turned rusty. If it’s black, it has turned to rust. If the tip of the solder is exposed to dirt by iron, it changes how well it sticks.
How to fix solder that won’t stick to iron?
You can fix a solder that won’t stick to iron by replacing the heating element. Cleaning the iron or practicing proper soldering techniques.
Replace the heating element
If the heating element on your soldering iron is broken, the solder won’t stick to it. If it’s broken, it needs to be replaced. Here is how to replace it;
- Loosen the nut that holds the heat shield and slide it off.
- Take off the tip and platform at the tip (flanged metal piece).
- Loosen the plastic nut and take it off.
- If you have a smoke absorber, remove at least two clips to get the cord out of the way.
- Grab the bottom of the cord and pull up on the handle to reveal the PCB board.
- Attach the new element to the spring and push it down until it touches the PCB.
- Reassemble
Clean the iron
Not only does the tip of your soldering iron need to be clean and free of oxidation, but so do other parts. Your iron and materials must also be. Here is how to clean it;
- Rub your iron with a rag dampened with water first
- Mix a soap and water solution.
- Rub off the buildup.
- The use of a strong flux should sufficiently clean the iron
Practice proper soldering techniques
The best way to keep solder from building up on the iron tip is to learn how to solder properly.
- The solder needs a clean surface on which to adhere.
- Heat the connection for a few seconds with the tip of the soldering iron, then add the solder.
- Keep the soldering tip on the connection as the solder is applied.
- As soon as the solder is where you want it, take the tip off the connection. First, take off the solder and then the iron.
- Don’t move the connection while the solder is setting.
- Don’t heat the connection too much because that could hurt the electrical part you’re soldering.
- It shouldn’t take more than a few seconds to solder a connection.
- Check the joint carefully.
- Use a damp sponge to clean the tip of the iron. Now, the point should be shiny.
- When you aren’t using the soldering iron, unplug it.
Why won’t my solder stick to a copper pipe?
Your solder won’t stick to a copper pipe because the pipe is filthy or corroded. The copper is not hot enough or the solder is not hot enough, are other reasons your solder won’t stick to copper pipe.
Filthy or corroded copper
Not only does the iron tip matter when it comes to electrical soldering, but so does the copper pipe itself. Dust can get on the copper you are working with and make it stick less well. Instead, it will stick to the dust that has built up on the copper.
You must ensure your copper pipe is clean before working on it.
Copper isn’t hot enough
If the solder is hot and your copper pipe isn’t, your solder won’t stick to the copper. To solder, place the soldering iron tip against the melt and utilize the heat from the iron to melt the solder on top. If the copper’s surface temperature is not hot enough, the solder will not melt correctly or attach to the copper pipe.
Solder isn’t hot enough
Just as your copper pipe mustn’t be enough, it’s also essential that your solder is hot enough to stick to the copper pipe. The temperature of the soldering iron must be high enough to melt the insulation on the joined copper pipe. The iron point won’t melt as quickly as it should if the solder can’t generate enough heat.
How to fix solder that won’t stick to a copper pipe?
You can fix a solder that won’t stick to a copper pipe by cleaning your copper pipe with steel wool. Inspecting the fitting socket and pipe or ensuring the copper pipe is well heated is another way to fix a solder that won’t stick to the copper pipe.
Clean the copper with steel wool
If you use a good flux, the copper isn’t clean enough. Steel wool will be needed to clean it. For the solder to stick, your copper pipe must be very shiny and clean. Here is how to fix it;
- Use emery cloth or, better yet, a non-steel abrasive such as ScotchBrite.
- Steel wool of medium or fine quality is great, but be careful not to leave bits in the joint.
- Coat only the mating surfaces with a thin coat of the appropriate flux.
- A small amount on a finger works great.
Inspect fitting socket and pipe
Inspect the fitting socket and pipe to help the solder stick well. Here is how to inspect it;
- Use the OD and ID brushes to clean the fitting socket and pipe thoroughly.
- Check the fit.
- Place the pipe in the vise, which should be oriented horizontally.
- Using a tiny flux brush, apply flux to the mating surfaces.
- Slip the fitting over the pipe’s expanded end.
- Keep an uncoiled length of solder on hand.
- Use a propane torch to uniformly heat the outer pipe fitting.
- It should not be necessary to shift over to heat the pipe that slides into the fitting.
- Holding the solder at the joint’s edge, it should be dragged in between the pipe and fitting and flow right in.
- Stop feeding solder when some solder appears all around the edge of the outer fitting.
- Use a cloth to clean off any flux that has spilled out while it is still hot and soft.
Ensure the copper pipe has enough heat
If your copper pipe doesn’t have the right temperature, the solder won’t stick. Ensure the copper pipe is at the right temperature before even trying to solder it.
- Small copper pipe will require a lower-wattage soldering iron and will heat up in a matter of seconds.
- A larger piece will take more time.
- Finally, the amount of time required to heat the copper pipe will be determined by its size, temperature, and iron powder.
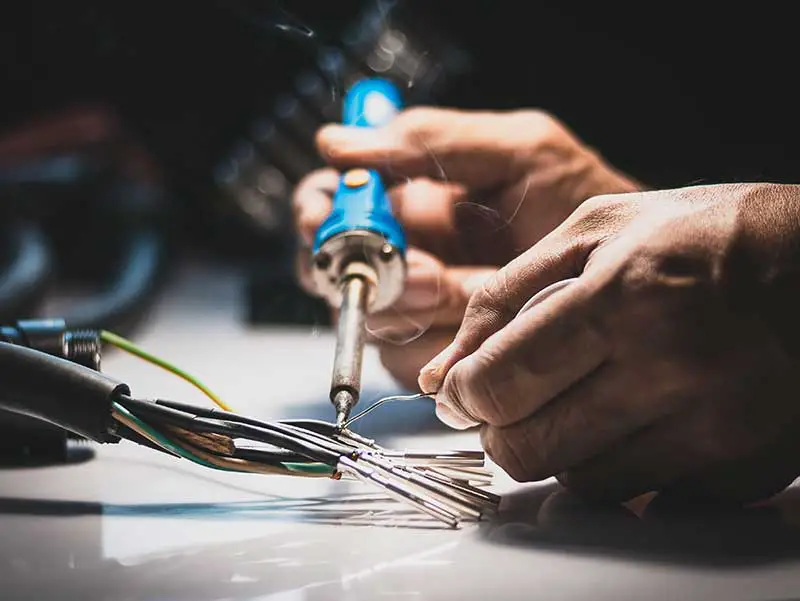
Why won’t my solder stick to copper wires?
Your solder won’t stick to your copper wires because the surface is too smooth. A cold or overheated joint are other reasons your solder won’t stick to the copper wires.
Smooth surface
If the copper’s surface is incredibly smooth, when you put solder to it, it will not stick to it. To apply solder, the surface should be rough or tinned so that it will melt and stick when you apply solder. You can do this by roughening the surface of the copper wire with sandpaper or a hand file.
Cold solder joint
If you look at a joint and see that it is rough and uneven, like a joint that has been moved, but you know there was no unnecessary movement, it was probably made with cold solder. This indicates that the iron or copper wire surface temperature was not high enough to fully melt the solder. Without maintenance, this joint is likely to crack or fail.
Fixing this problem is the same as fixing a joint that is loose. Before you use your iron to solder again, you should always check it to make sure it works at the right temperature.
Overheated joint
Overheated solder is the opposite of cold solder, solder that hasn’t been heated enough. This problem can potentially arise from a soldering iron tip or surface that hasn’t been properly cleaned. If you heat solder for too long, the flux will burn, and the junction will seem sloppy and singed.
This problem is harder to fix because you need to remove the burned flux residue instead of soldering over it.
How to fix solder that won’t stick to copper wires?
You can fix a solder that won’t stick to copper wires by heating the solder and tubing. Cleaning oxidization or using the right soldering skill is another way to fix a copper wire that won’t solder.
Heat the solder and tube.
You need to heat the solder and the tube with the right amount to make your solder stick to the copper wire. Here is how to fix it;
- Leave the fitting attached to the copper tube.
- For about 20 seconds, use direct heat from the propane torch to heat the joint.
- Touch the soldering wire to the joint when you believe it has achieved the proper temperature.
- The solder will melt and be drawn into the junction formed by the tubing and fitting.
- When you observe melted solder flowing and spilling out, you know it’s time to quit.
Clean oxidization
When soldering, if the copper wire tip oxidizes, it greatly alters the soldering experience. The solder will no longer stick well. Here is how to fix it;
- To begin, heat the soldering iron to its normal temperature (300°C).
- Allow the solder point to ignite after coating it with colored flux.
- The high temperature of the tip initiates a chemical process that allows us to extract the oxidized product.
- It is advised that a thin layer of solder be applied to the tip. This approach not only protects the tip from the air but also holds the solder together when the iron is heated.
Use the right technique
The technique you use in soldering is very important. When soldering, people frequently cause problems by allowing the solder to sit on the soldering iron before using it in the binding procedure. It is essential to use the right technique for your solder to stick to the copper wire. Here is how to fix it;
- The best method to avoid solder sitting on the iron tip is to learn proper soldering techniques.
- Patience is required in this scenario because it may take some time.
Why won’t my solder stick to aluminum?
The reason your solder won’t stick to aluminum is that the aluminum is not hot enough to receive the solder. The wrong flux or the wrong tool is another reason your solder won’t stick to aluminum.
Aluminum is not hot enough
If your aluminum does not receive the right amount of heat, the solder won’t stick. Aluminum requires high heat to receive solder, typically at temperatures 300°C or more. And you should be measuring the temperature of the aluminum, not the temperature of your heat source.
Because aluminum is a great heat sink, the heat source must be much more powerful to get the aluminum to the proper temperature. Soldering aluminum is not like soldering copper; simply heating and melting the solder is insufficient.
You need the right heat for your solder to stick.
Wrong flux
If you use the wrong flux, the solder won’t stick to the aluminum. You’ll need aluminum soldering flux, which is specially prepared for soldering aluminum. A flux that is strong enough to solder an alloy like stainless steel does not necessarily work on aluminum.
Wrong tool
The tool you’ll need to solder aluminum is different from all other tools. If you’re using the wrong tool, your solder won’t stick. Before you begin, ensure you have all the tools for soldering aluminum.
Because aluminum has a low melting point of roughly 660°C, you’ll also need a solder with a low melting point. Make certain that your soldering iron is designed specifically for joining aluminum.
How to fix solder than won’t stick to aluminum?
You can fix a solder that won’t stick to aluminum by using the right heat or using the right flux.
Use the right heat
The right heat is essential for your solder to stick to aluminum. Even if you use the appropriate flux and solder, you won’t be able to solder if the aluminum isn’t hot enough to take the solder alloy. Here is how to fix it;
- Use a low-temperature torch
- Then, a flame tip that reaches 600 to 800ºF (315–425ºC).
Use the right flux
The right flux is needed for your solder to stick to aluminum. The flux, like the solder, should be tailored to aluminum or the metal combination you intend to join. The simplest choice is to obtain your flux from the same place you get your solder, as they are almost certainly designed to function together. Here is how to fix it;
- Use a flux that is solely designed for aluminum.
- The recommended temperature for the flux you choose should be close to your solder’s melting point.
- If the solder you picked melts over 840oF (450oC), uses a brazing flux.
Why won’t my solder stick to the circuit board?
The reason your solder won’t stick to the circuit board is because of an untrimmed lead. Insufficient wetting or a solder bridge is another reason your solder won’t stick to the circuit board.
Untrimmed lead
After putting the right amount of solder on the joint, you can lift it up to make a lead, a small stem sticking out of the joint. When working with circuit boards, these leads must never cross or connect. If they do, it will hurt the board’s connections and make it less useful.
When the leads are too long, the whole joint is more likely to bend or come loose. To stop this from happening, you need to trim the leads, so they are just above the solder joint.
Insufficient wetting
This is a common problem when soldering on a circuit board. During the whole process of soldering, there are many places where there isn’t enough wetting. You might not wet the solder pad, the pin, or the surface mount well enough.
Most of the time, these problems can be fixed by heating up the surface and adding more solder where needed.
Solder bridge
This is another prevalent problem when soldering a circuit board. A solder board will connect two joints, interfering with the general functionality of the board. This frequently occurs when too much solder is used at once to form a junction.
You need to remove the excess solder to resolve this issue. Depending on your equipment, you can perform this with a solder wick, solder sucker, or hot iron tip.
How to fix solder that won’t stick to the circuit board?
You can fix a solder that won’t stick to the circuit board by applying the solder to the board direct or cleaning the part you want to solder.
Apply solder to the board
Your solder won’t stick to the circuit board if you’re applying the solder on the wire instead of the board. Here is how to fix it;
- To begin, solder a big component to a circuit board through thru-hole solder pads.
- Heat the solder pad with the tip of a soldering iron to open the solder-blocked hole. Push through the molten solder from the other side with a staple or sewing needle.
- Enlarge the hole once the tool has completely passed through it by heating the top side of the solder pad while pressing through with the tool.
- Remove any extra solder from the contacts of your component before soldering.
- The contacts should be sufficiently clean to pass through the solder pad holes.
- Try using the iron to heat up the board’s pad. You’ll have a better chance if you heat both the wire and the pad.
- Instead of using the tip of the soldering iron, the solder can be applied to the pad.
Clean the soldering part
If the part you’re trying to solder on the circuit board is dirty, the solder will not stick. You must clean the soldering part before starting. Here is how to fix it;
- Wash your hands first
- Then wash the board with an “SOS” Pad, rinsing thoroughly with warm or hot water.
- Then, promptly dry it with a clean cloth or paper towel!