Why your drill chuck won’t tighten?
The reason your drill chuck won’t tighten is because the screw in your chuck is loose or you’re using the chuck incorrectly. Dirt in the drill or a rusty screw is another reason your drill chuck won’t tighten.
Loose screw
The drill chuck has clamping jaws that secure the drill bit. A screw inside the chuck secures it to the drive shaft. Because the screw has reserve threads and sometimes the screw is loose, tightening your chuck drill becomes challenging. If the screw in the chuck of the drill loosens, it can prevent the chuck from being tightened, which in turn prevents the teeth from moving.
To fix this issue, put the right screwdriver into the drill chuck and tighten it. Note that the thread on this screw is reverse, so you must turn it counterclockwise to tighten it.
Incorrect usage
If you’re new to using a drill, you might not know how a drill chuck works. If you don’t understand how to use it, you might keep using the drill incorrectly, which will make the chuck stuck and won’t tighten. If you forcefully open it, the screw securing the drill chuck can loosen.
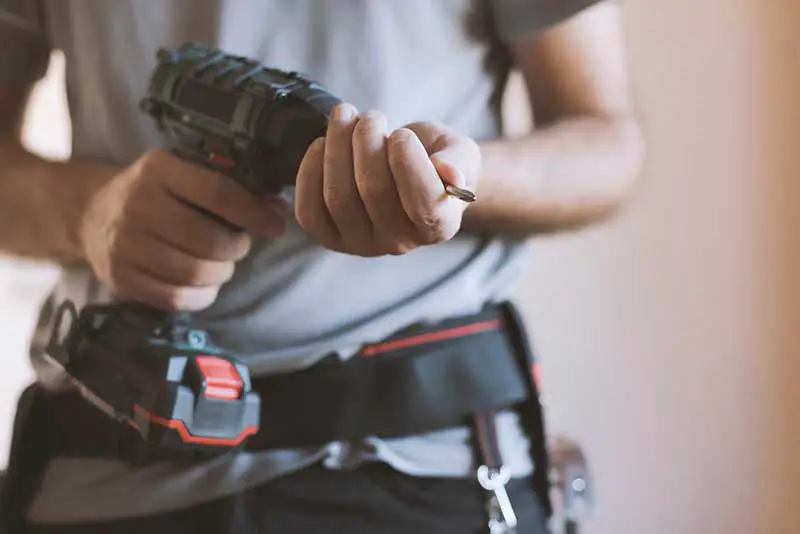
There are two parts to the drill chuck. When you are adjusting or taking out the drill chuck, you hold on to the black part. The drill chuck is opened and closed by turning the yellow part.
Dirt in the drill
When you use your drill often, it will get dirty. Sap, water, and other sticky things can cause the screw in the drill chuck to rust. Water, in particular, can make it rust and get sticky. Because of this, it’s hard to tighten the drill chuck.
Rusty screw
If the screw securing your drill chuck is rusted, your drill chuck won’t tighten. This can lead to damaging your chuck. The screws are one of the first things you should look at on your chuck. Even a small amount of rust can make them impossible to tighten.
How to fix a drill chuck that won’t tighten?
You can fix a drill chuck that won’t tighten by tightening the screw or replacing the chuck. Applying spray on the chuck is another way you can fix a drill chuck that won’t tighten.
Tighten the screw
The chuck screw is in the drill chuck, and it helps hold the drill chuck on the drill securely. If this screw is loose, the drill chuck won’t tighten. Here is how to fix it;
- Get the right screwdriver at hand.
- The type of screw in the drill chuck will determine the screwdriver you use.
- Insert the screw by inserting the screwdriver through the hole made by the drill.
- Then tighten the screw in a counterclockwise position
Replace the chuck
Over time, a drill chuck might wear out, or it can accumulate rust or dust that will eventually cause it to loosen up. It is necessary to replace it when this happens. Here is how to replace it;
- Remove the screw from the chuck’s center. (If your model doesn’t have a screw, you can skip this step.)
- Pick the biggest Allen wrench that will fit.
- Turn the Allen wrench to tighten the chuck so that it stays in place.
- Put the gearbox in its lowest position.
- Place the drill so that the Allen wrench is on its side and hangs over the edge of your workbench.
- Use a mallet to hit the Allen wrench.
- Most drill chucks have a standard thread, so striking the Allen wrench in a counterclockwise direction should loosen the chuck from the drill.
- Once you’ve loosened the chuck from the drill’s body, you can unscrew it by hand.
- Thread-locking fluid should be applied to the end of the screw before installing the new chuck.
- Insert the new chuck in place.
Apply spray
Lubricating your drill chuck is the most effective technique to prevent it from becoming sticky, rusty, or gummy. Here is how to lubricate it;
- Use White Lithium Specialist Grease from WD-40.
- Simply spray some of the product on the drill chuck and massage it.
- Applying WD-40® will restore smooth operation to your drill.
- Always use the spray after every use of your drill.
You can also lubricate it with oil;
- Open up the chuck
- Put a few drops of lubricant oil into the chuck
- Close and open the chuck five times to spread the lubricant evenly.
- Use a soft cloth to clean up the extra oil.
- You can start working on your project right away with the drill.
Why Your Drill Chuck Won’t Stay Tight?
The reason your drill chuck won’t stay tight is because your drill is worn out or it isn’t locking properly. A dirt chuck is also another reason your drill chuck won’t stay tight. If something gets stuck in the drill chuck, it won’t be able to hold the drill bit tight enough.
When your drill chuck doesn’t stay tight, you should try to clean it first because there might be some dirt preventing it from tightening. Also, after cleaning, if it is still loose, you might have to replace your drill chuck or spend more dollars by buying a new drill.
Why your Dewalt drill chuck won’t tighten?
The reason your Dewalt drill chuck won’t tighten is because the drill chuck is dirty or the drill is not properly tightened. On rare occasions, you may find that your Dewitt drill chuck won’t tighten. This is a problem that arises whenever you have to switch out your drill bit. Fortunately, resolving this issue is typically quite straightforward.
Here is how to fix it;
- Get the right screwdriver that matches your Dewalt screw
- Ensure the drill bit is properly inserted
- Screw the drill bit
- And tightened it
- Ensure you tighten in an anticlockwise position
Why your Bosch drill chuck won’t tighten?
The reason your Bosch drill chuck won’t tighten is because there is debris in the spindle thread, or your drill chuck is faulty and needs to be replaced.
Loosen drill chuck can be caused by debris on the spindle thread. In many cases, the issue can be fixed by simply cleaning the spindle thread or by tightening the fastening screw. If, after cleaning, you realize there is a need for the chuck to be replaced, you should call an expert or follow these simple DIY steps.
The following are tools you need to finish this task is listed below.
- Screwdriver with a Phillips head
- 1/2-inch hex key
- Rag
- A chuck (either 1/2 in. or 3/8 in., depending on the model) to swap out.
Here are the steps to follow;
- Take the battery out of the tool.
- Put your fingers on the side tabs and push them toward the battery. Then, pull the battery straight out of the drill.
- Turn the clutch sleeve past the numbers until you see the drill-bit-looking symbol.
- Hold the drill in one hand, and use the other hand to turn the chuck sleeve counterclockwise.
- With a Phillips-head screwdriver, turn the screw clockwise to remove it from the chuck.
- Put the short end of a 1/2-inch hex key into the chuck and tighten the jaws like you would when installing a drill bit.
- With a mallet, hit the long end of the hex wrench to turn the chuck in the opposite direction.
- Use a clean rag to wipe the drill’s spindle head.
- With your hands, turn the chuck spindle clockwise to put the new chuck on it.
- Put the hex key’s short end into the new chuck and tighten the jaws.
- Open the jaws of the chuck all the way and let go of the hex key.
- Put the screw in the bottom center of the inside of the chuck, and use the Phillips-head screwdriver to make it tight.
Remember, it is a reverse thread screw. So, to install and tighten it, you must turn it counterclockwise.
Why your Makita drill chuck won’t tighten?
The reason your Makita drill chuck won’t tighten is because of a loose screw or a worn-out ring. Following a few steps to tighten the chuck is an easy way to fix it.
Here is how to fix it;
- Use channel lock pliers to loosen it.
- Then use the right kind of screwdriver to tighten the screw.
- Go ahead and hold onto the ring.
- Turn the sleeve counterclockwise.
- Then insert the drill bit and start using your drill.
Why your Milwaukee drill chuck won’t tighten?
The reason your Milwaukee drill chuck won’t tighten is because the drill bit is crooked or has a loose screw. A screw inside the chuck keeps the drive shaft attached to the chuck. The screw has backwards threads, and sometimes it comes loose, making it hard to tighten the chuck.
Here is how to fix it;
- Remove the battery from the Milwaukee drill
- Set the transition to low
- Set the clutch to the drill setting.
- Adjust the vise by turning the collar until it opens just a little bit more than the size of the bit’s shaft.
- Keep the bit in place and turn the collar in a counterclockwise direction until the vise grips the bit’s shaft.
- Hold the collar firmly and turn it counterclockwise until you can’t turn it anymore no matter how hard you try.
- You can use the key to tighten your drill, by putting the key in and turn it counterclockwise until it won’t move even when you push on it hard.
Note: You should replace your Milwaukee drill bit whenever it is crooked this will prevent you Milwaukee drill chuck from being loose.