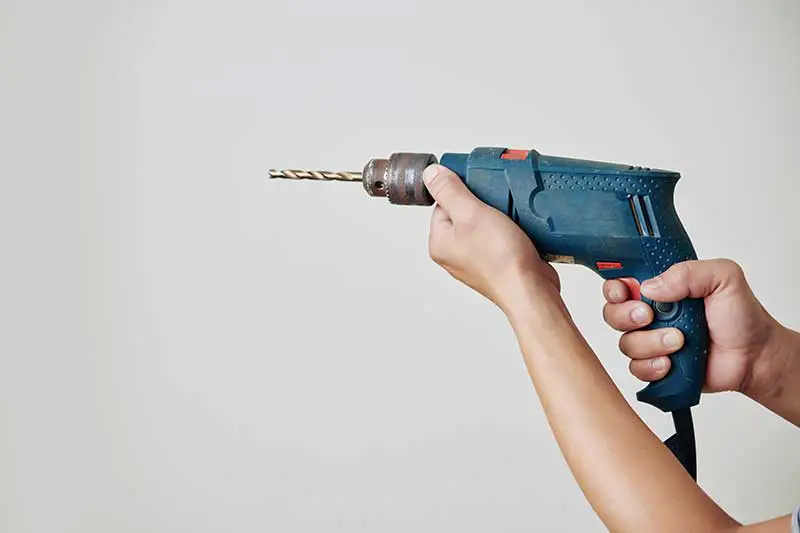
Why your drill won’t go through the wall?
The reason your drill won’t go through the wall is that you’re drilling in the wrong rotation or the batteries in your drill are dying. Drilling with the wrong drill or when there’s a metal plate in the wall is another reason your drill won’t go through the wall.
Wrong direction of rotation
You won’t be able to drill through the wall if your rotation is in the wrong direction. If the rotation setting is incorrect, it will be tough for your drill to make any headway into the wall. It will be difficult for the drill to go through the wall if it is set to rotate counterclockwise.
When in the forward position, a drill will rotate clockwise; in the reverse position, the drill will rotate counterclockwise. Most drills have a forward/reverse button; when drilling into the wall, you need to have the drill in the forward position, as the bit won’t bite if the drill is rotating in the opposite direction.
Dying batteries
Inexpensive drills certainly use cheap batteries that don’t last as long as those sold separately. The drill’s battery may die if you’ve had it for a while. Drills can be weakened by a dying battery, so if you have trouble drilling, especially through solid material, you might need to check the battery.
If you want to test the drill’s functionality, charge the battery and test if your drill will be able to drill a small pilot hole. If the drill still doesn’t work, try drilling a pilot hole with a corded drill.
Wrong drill
Using the wrong drill won’t allow you to drill through the wall. There are various kinds of drills for different walls. When you use the wrong drill, not only will your drill not get through the wall, but you will also be at risk of spoiling your wall.
Look at the wall to see what material it’s made of before you start drilling. It’s likely that you have drywall, such as sheetrock or plasterboard if knocking on the wall produces a hollow sound.
Metal plate
Do you know your wall hides a lot of things? Pipes, wires, and sockets are some of these things your wall hides. When you are drilling, and it is not going through, it is probably one of those things your wall is hiding that stops your drill.
Metal plates are commonly used to cover pipes and wires in your wall. So, if you’re drilling into a wall and strike what seems to be an impediment, you may rest assured that it’s actually a metal plate hiding something vital. If you hit the metal plate while drilling the wall, you may try again around five inches above or below where you hit in the first place.
How to fix your drill that won’t go through the wall?
The way you can fix a drill that won’t go through the wall is by using the right drill or repairing the battery. Another way you can fix a drill that won’t go through the wall is by drilling in the right direction of rotation.
Use appropriate drill
Fixing a drill that won’t go through the wall is as simple as using an appropriate drill. Each type of wall has a specific type of drill for it. You might be using the wrong drill all this while that is why your drill is failing. Here is how to select the right drill;
- If you knock on your wall and hear a hollow sound, it means the wall is made of sheetrock or plasterboard, use a drywall bit.
- Choose a masonry bit if your wall is made of hard materials like brick, block, concrete, or stone.
- Choose a spur point bit to drill into a wall with wood paneling.
- Choose a tile bit for tile, glass, or ceramic
Repair battery
Drills can be weakened by a dying battery, so if you have trouble drilling, especially through solid material, the battery is at fault and needs to be repaired. Here is how to repair it;
- To begin, disassemble the drill.
- The battery can be accessed after the cover is removed, and the housing is unscrewed.
- Check the battery for signs of damage.
- The battery should be replaced if there are any signs of damage, such as cracks or leakage.
- Cleaning the battery contacts is the next step. An alcohol-soaked cotton swab will do the trick here.
- After the drill’s contacts have been cleaned, you can put them back together.
- Ensure the battery is securely fastened before replacing the housing’s screws.
- Last but not least, you should check the drill’s functionality.
Place your drill in the right direction of rotation
The most prominent cause of a drill’s inability to progress through a wall is that its spin is going in the wrong direction. You need to ensure your drill is in the right direction to fix this problem. Here is how to place your drill in the right direction of rotation;
- Ensure you are not drilling into electrical wiring by accident.
- Do not drill immediately above or below light switches, outlets, and other apparent electrical devices in your walls.
- After deciding where to drill, you should mark the area.
- Mark the precise area of the hole you intend to drill with a dot or X using a pencil or other marking instrument.
- In the forward position, rotate your drill in a clockwise direction
- In the backward position, rotate your drill in a counterclockwise direction.
Why your drill won’t go through wooden studs?
The reason your drill won’t go through wooden studs is because you are using the wrong drill, or you could be hitting a nail plate. If the clutch setting is too low or the battery is dying is another reason your drill won’t go through wooden studs.
Using the wrong drill
You probably already know that the drill bit you use needs to match the screw you are working on. If you’re using the wrong drill, you won’t be able to drill through your wooden studs. It may seem obvious, but not all Phillips head parts are the same, and many appear very similar.
Ensure you have the proper bit if you need to use a specific screw. Also, drills come in different sizes; remember to get the right size.
Hitting the nail plate
Drilling through a wooden stud is obviously not a simple task. Different materials have different resistance to drill bits; some can withstand quite a bit of pressure, while others, like nail plates, would shatter under even minimal pressure. When you hit the nail plate, your drill won’t be able to through the drill anymore, and this might cause your bit to break.
The clutch setting is too low
There are different numbers on the drill. These numbers control the clutch, and each number tells you how much force you use to make the drill. When drilling into wood, if you apply too much pressure, the screw will go in too deep before you can pull it out. Also, if your drill doesn’t apply enough force, it will stop and be unable to drill into the wood.
The higher the number on the clutch, the greater the force. If your drill isn’t going through, try to increase the clutch force. This will force the drill to exert more force and get through the wood.
Dying battery
If you’re using a cheap drill, there is every tendency that the battery will get worse over time. When drilling through a wooden stud, and there is a sudden stop, ensure to charge the battery first. If, after charging, you’re still unable to drill through, changing the battery is your best bet!
How to fix your drill that won’t go through wooden studs?
You can fix your drill that won’t go through wooden studs by setting the speed or adjusting the clutch. Turning the drill in the right direction is another method to fix your drill that won’t go through wooden studs.
Setting the speed
Most drills have two speeds, while some have three. The adjustable speed lets you perfect your drilling through a wooden stud without any stops. Here is how to set;
- Setting 1 is best for driving screws because it has low speed and high torque.
- Setting 2 is a medium speed/torque setting that can be used for drilling into the wooden stud.
- Setting 3 is the fastest and can be used to drill fasteners.
- You could damage your drill if you change the speed switch when the tool is still running.
- Ensure you stop drilling whenever you need to change any of these speeds.
Adjusting the clutch
When drilling through a wooden stud, the clutch setting is the most important thing to get right. You’ll see a list of 1–10 or 20 numbers. These are used to set the clutch for a certain amount of torque. Use these numbers to constantly adjust your clutch. Here is how to adjust;
- To adjust your clutch, move the arrow to a lower position and start drilling.
- If there is too much resistance, the clutch will pull the motor out of the gear.
- Adjust the clutch to a higher number and find the sweet spot that will drive your screw to the right depth without disengaging the motor or overdriving the screw.
Turning the drill in the right direction
If your drill is in the wrong direction, your drill won’t go through the wooden stud. To avoid this, you must ensure your drill is in the right direction. Here is how to fix it;
- Ensure your drill is turning clockwise to tighten
- Then anticlockwise, if you’re reversing
- If you can’t do this, there is a trigger on the drill that you can press, which will help you adjust your direction.
Why your drill won’t go through brick?
The reason your drill won’t go through brick is that the drill is in the wrong setting or the pressure is incorrect. An incorrect drill bit or wrong drill speed is another reason your drill won’t go through brick.
Wrong setting
One of the most irritating experiences that can happen to anyone when drilling a brick is your drill not going through. This can occur if the drill’s setting is wrong for the task. In most cases, there are three distinct settings that may be adjusted on a drill by turning a dial or flipping a switch.
First is the drill setting, which is used for boring holes in relatively soft materials like wood and plastic. For driving screws into various materials, the drive setting is the second option. The hammer mode is the last available option.
When your drill is not in hammer mode, your drill won’t go through. The hammer setting drives the drill into the brick wall or other solid material with back-and-forth motions, like someone wielding a hammer.
Incorrect pressure
If you drill with the incorrect pressure, your drill won’t go through the brick, and your bit will get overheated. With a hammer drill, breaking through brick shouldn’t take much force because the hammer function should do most of the heavy lifting. When you are drilling your pilot hole, use medium pressure straight on. Too much pressure can make the bit slip or overheat.
Incorrect drill bit
One of the most prevalent causes of a drill not entering a brick is the use of an incorrect drill bit. It is necessary to use a masonry drill bit when drilling into brick. It’s risky to use a bit that’s too small because it can break, but it’s also challenging to get enough torque from the drill to rotate a too-large bit and get it into the brick.
Wrong drill speed
Using high speed on the drill will cause the drill bit to overheat, which is one of the most common issues when drilling into brick. Most hammers have a dial with numbers or bars, indicating the speed setting on most hammer drills. You can use these settings to get the right amount of speed.
How to fix your drill that won’t go through brick?
You can fix your drill that won’t go through brick by applying the right pressure on your drill or drilling at the right location. Using the right speed is another method to fix your drill that won’t go through brick.
Apply the right pressure
Applying the right pressure while drilling a brick will help your drill go through without any problem. Here is how to apply the right pressure;
- Start steadily with low pressure.
- Gradually increase the pressure until the drill bit gets into the brick.
- Then, when the drill bit starts to go into the brick, ease off the pressure a little.
Drill on the right location
The hole’s position must be determined before drilling through brick or mortar. Your drill and the wall will be ruined if you drill in the wrong place. Here is how to choose the right location;
- When drilling on brick, drill at an angle that prevents cracking.
- Measure the width and length of the device that holds it in place. This will help you find the right size and length of the drill bit.
- Use a pencil or chalk to mark where you want to drill.
- Make sure no electrical wires or other things are in the way.
- Wear protective gear like goggles, gloves, and a respirator.
- Then begin drilling.
Use the right speed
You must use the right speed when drilling your brick. Here is how to get the right speed;
- Mark where you want to drill the holes.
- Set up a stop on your drill that is the same depth as the hole you want to make.
- Put on your safety gear.
- Use a drill with a low speed.
- Use a drill whose RPM can be changed.
- Take the bit out of the hole every so often.
- Put the pilot drill bit in a straight line with the brick and drill slowly.
Why your drill won’t go through the wall above your window?
The reason your drill won’t go through the wall above your window is because you have hit the metal lintel above your window or your drill bit is dull. A steel stud is another reason your drill won’t go through the wall above your window.
Metal lintel
If your drill doesn’t go through the wall above your window, then you probably have a metal lintel behind your wall. These lintels are installed horizontally above openings like windows to support the weight of the structure above. When you hit the metal lintel, your drill won’t go through.
You need to drill until you reach solid wood when this happens, and then secure your blind with self-tapping screws. If you want to avoid burning up your drill bit and wasting time, you should avoid the hammer setting and work at a slower speed.
The drill bit is dull
The drill bit can be dull if you’ve been using it for a long time. Incorrect use (such as attempting a pilot hole in drill mode) or inadequate material ejection can cause the bit to be dull more quickly. If your bit is dull, you won’t be able to drill through.
Sharpening your bit will solve this problem, and you can drill perfectly again.
Steel studs
If you’ve ruled out other possible reasons why your drill won’t go through, and your house is relatively new, then the steel studs are likely the cause of the stop you’re experiencing. You can know if the steel stud is the problem by asking the builder, looking at the construction paperwork to see if steel was used in the framing, or making a hole in the drywall and looking behind it.
Once you confirm the steel stud, you can drill through by using metal drill bits.
How to fix your drill that won’t go through the wall above your window?
You can fix your drill that won’t go through the wall above your window by drilling appropriately on the metal lintel or sharpening your drill bit.
Drilling appropriately on the metal lintel
When drilling and you notice a metal lintel, you do not need to stop drilling. All you need to do is drill rightly on the metal lintel. Here is how to drill;
- Start with the smallest drill you have in your set
- A 3mm drill is a good place to start
- Once you’ve broken through the plaster and reached the lintel beam, you need to switch your drill bit for a high-speed steel bit.
Sharpening your drill bit
A sharpened drill bit will help your drill through your window successfully. Here is how to sharpen your drill bit;
- Insert the bit of drill into the jig.
- Make sure the drill bit fits in the slot well. It should fit right into the middle of your jig’s groove.
- Turn on the grinding wheel and move the drill bit toward the grinder as you turn on the wheel.
- Move the sharpening jig back and forth with one hand while holding the drill bit up to the grinder.
- If you have a lot of grinding to do, you might need to dip the drill bit’s tip in water every minute or so to keep it from getting too hot. Keep smoothing your drill bit’s edges until they are all the same.
- When you’re done grinding down your drill, it should work much better than before. You can ensure that your newly sharpened drill bit is sharp by using it on a scrap piece of wood or metal.
How to fix your drill that won’t go through metal when installing blinds?
You can fix your drill that won’t go through metal when installing blinds by using low speed or using a stronger bit. Adding cutting oil is another way to fix your drill that won’t go through metal when installing blinds.
Using low speed
Drilling through metal is not an everyday home repair task, and it can be a challenging task. When drilling through, you need to go as slowly as possible. The metal or drill bit won’t break or overheat if the speed is low. Here is how to use slow speed;
- Put the end of the drill bit in the hole and hold it so that it is perpendicular to the metal.
- Hold the handle with one hand and put your other hand on top to give yourself more support.
- Use drill bits smaller than 1/16 inch (1.6 mm) and up to 3,000 RPM.
- If you’re using a drill bit bigger than 12 inches (1.3 cm), keep the RPM between 1,000 and 1,500.
- Most drills should be run at about half speed or slower.
The bigger the bit, the slower it should spin.
Using stronger bit
When you’re drilling into metal, you’ll need a stronger bit. If you’re drilling into a soft metal like aluminum, you can use the same high-speed steel bit you’d use on wood. Here is how to select a stronger bit;
- Use a cobalt bit
- High-Speed Steel is mixed with cobalt to make drill bits stronger and less likely to break.
Adding cutting oil
The drill bit gets hot when you drill into metal, but cutting oil cools it down and keeps it from getting stuck. Here is how to add cutting oil;
- Mark the part you want to drill
- Add the cutting oil to the marked surface
- Then keep drilling
Note: Keep the cutting oil in a place close to you so you can keep adding while drilling.