Why is my miter saw not cutting straight?
The reason why your miter saw isn’t cutting straight is because your miter gauge is misaligned or your saw’s inability to clamp the material down. An unstable fence that isn’t functioning well, a bad blade, or the bevel gauge is misaligned on your miter saw are other reasons your miter saw isn’t cutting straight.
Misaligned miter gauge
In the same manner that the bevel gauge of your miter saw can become misaligned, the miter gauge of your saw can also suffer the same fate. This results in mistakes while making straight kinds of cuts with your saw.
The cut angles will be incorrect if the miter gauge is not aligned correctly before you begin. This will cause complications while you are putting together your project; you will discover that you cannot get a straight cut.
Inability to clamp material down
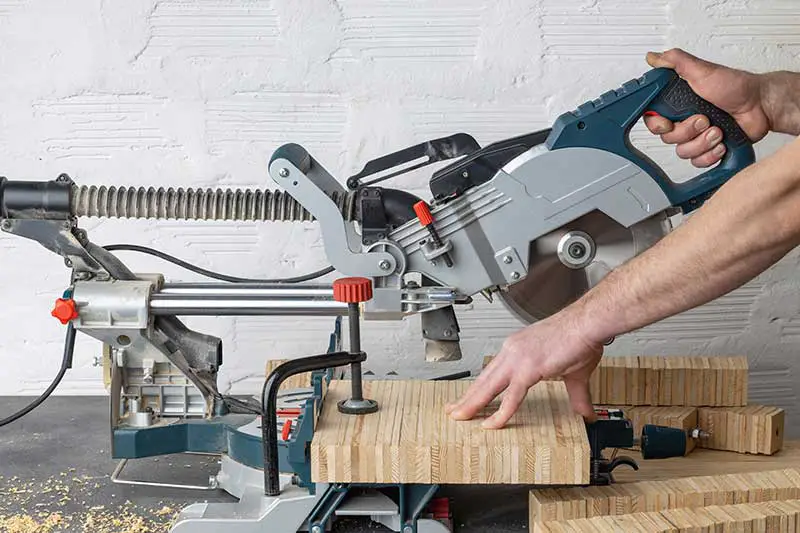
The most common complaint of miter saw users is that the saw does not make good cuts when used to make bevel cuts. This issue is largely caused by the dynamics of the saw itself and the physics that are at play during the bevel cut. When preparing the saw to make a bevel cut, you will angle the head of the saw, which is the part of the saw that holds the blade, to the appropriate angle for the bevel.
When the saw is lowered to make the cut, the angle of the saw combined with the spin of the blade wants to pull the workpiece in towards the saw blade. This is because the angle of the saw is steeper than the angle of the saw’s cut.
This can cause the saw to shift as the cut is being made, and any movement, however slight, in the wood will cause the cut to be inaccurate and prevent it from being straight and true. During the bevel cut, ensuring that the workpiece is firmly secured to the saw table is the most effective method for preventing this problem.
An unstable fence
The fence is a crucial component of the miter saw, even though it is frequently neglected during normal maintenance. While the blade is doing its function, the fence serves the role of holding the material in place to ensure that it is square. Because of its location, it is typically difficult to determine when the fence has moved out of its proper alignment.
However, you should be aware that even a slight problem in this section can cause major disruptions to your cuts. When troubleshooting your saw’s failure to make straight cuts, the fence is another place to look after the blade.
A bad blade
The blade of your miter saw being in poor condition is probably the most prevalent reason for the saw not cutting straight. To begin, blades just do not have an indefinite lifespan. If you have an extremely old blade that is beginning to lose its sharpness, then it is going to have a difficult time cutting through any kind of material. The cuts may turn out crooked if the instrument is dull and so experiences a lot of friction.
These miter saw blades are susceptible to various types of damage, including cracking, bending, and warping, due to severe and prolonged use. This is especially the case if you use the blade of your miter saw for a material not designed for in the first place. For instance, if you try to cut metal with a blade made for cutting wood, there is a good probability that some of the teeth on the blade will break off.
Misaligned bevel gauge
You rely on the accuracy of the bevel gauge on the miter saw to provide you with the appropriate angle for the cut when the miter saw blade is slanted to perform bevel cuts. The movement of the machine or the impact that the miter saw has suffered can cause the alignment of the bevel gauge to be off, resulting in a wrong cut.
Not only is this possible with an older saw, but the gauge on brand-new equipment that has never been used before may also be erroneous. The gauge may be out of alignment since the miter saw had a bumpy ride to your workshop from wherever it came from.
Most miter saws come with a technique explained in the manual that shows how to realign the bevel gauge so that the angle of the cut can be accurate once again. Because each saw is unique, you will need to refer to the user manual that came with your miter saw to determine the exact process for using your saw.
How to fix a miter saw that’s not cutting straight
You can fix your miter saw that’s not cutting straight by aligning the fence with the blade, aligning your miter saw, and straightening your miter saw fence.
Aligning the fence with the blade
Your fence needs to align with the blade so your miter saw can cut straight. Here are steps to align your fence with the blade.
- Utilize a T-square to determine whether or not the blade and the fence are parallel to one another.
- You need to observe a precise right angle of 90 degrees.
- Refer to the owner’s manual of the saw in question for information regarding how to modify the fence.
- In most circumstances, all that is required is to unscrew it, make the necessary adjustments, and then screw it back into place.
Aligning your miter saw
It is not too difficult to properly align a miter saw. Your first step will be to check that the angle of the blade itself is set to 0 degrees. You will get a more accurate cut overall and more accurate reading on the following steps to take as a result of doing this.
- Make sure there isn’t any pitch buildup on the blade, particularly if you work with a lot of softwood. If required, give the blade a brief cleaning with some liquid laundry detergent and water. If you are interested in learning more, Woodworker’s Journal has a video you can watch.
- The cutting surface of the majority of miter saws is solid and flat. Confirming that your saw is aligned properly is a good practice that should be done before altering the other parts of the saw. Check the table for unevenness by laying a level or straight edge across it and looking for spaces.
- After that, examine the fence for gaps using a level or a straight edge that you set against it.
- You are in the clear if there are no holes in the plan. Make any necessary adjustments to the table and fence. The fence can be modified using the screws that run along the back of the saw if there are any spaces.
- After ensuring that the table and the fence are aligned correctly, it is time to make the necessary adjustments for accurate miter cuts.
- Loosen the screws that hold the detent plate in place. It’s possible that you’ll need to adjust the saw’s arm in order to access all of the screws.
- After loosening the screws, secure the saw so that it is stopped at 0 degrees on the detent plate.
- In order to locate the true angle of 90 degrees, you will need to spin the arm of the saw while aligning your square with the blade and the fence.
- Adjust the screw tension on the plate. After removing the screws on the outside, move the saw arm so you can access the screws on the interior.
- If the miter indicator is not reading exactly 0 on your saw even if it is locked into the 0-degree stop on the detent plate and the saw is at a true 90-degree angle, you may need to adjust the indicator. First, the screw holding it in place needs to be loosened, then it needs to be adjusted to the correct position, and finally, the screw needs to be tightened.
- Adjust your square, so it is parallel to the table and the blade. Adjust the 90-degree bolt at the saw’s back until the blade is at a proper 90-degree angle. The bevel adjustment should be unlocked.
- If the bevel indicator on your saw is not exactly 90 degrees, you may need to adjust the indicator to read exactly 90 degrees. To move it to the correct position, you need only release the screw holding it in place, make the adjustment, and then retighten the screw.
- Take the fence off the saw on one of the sides, then adjust the blade, so it is beveled at a 45-degree angle. Adjust your square, so it is parallel to the table and the blade.
- Adjust the 45-degree bolt, so the blade is at the correct angle of 45 degrees.
- Repeat the process on the opposite side if you use a saw with a dual bevel.
- Finally, to validate the accuracy of your saw’s calibration, you should practice cutting through some test materials. It may be necessary to repeat any alignments.
Continue with your projects once you have checked that the alignments of everything have been done correctly!
Straightening your miter fence
How you accomplish this task is determined by how you use your miter saw and the product’s maker. Follow these steps to straighten your meter fence.
- Taking down your fence and adjusting its positioning on a level surface is the quickest approach to get your fence back into alignment.
- Alternatively, you can set it up so that it is parallel to the blade and then use a specialized tool to twist or bend it.
- You can also grab hold of the stand itself, enabling you to move the saw segment forward or backward to change the alignment. This is an additional method.
- Getting it correct every time will require trial and error and fine-tuning of the settings.
- This can also differ from saw to saw in terms of the capabilities or adjusting mechanisms for making modifications and getting your miter saw fence to the ideal alignment. This is because your miter saw fence is used to cut angles.
- Some of them will even have a tiny spirit level integrated into the stand, which will assist you in making adjustments with complete and utter precision every time.
Why your miter saw cuts are concave/curved and not square?
Your miter saw cuts are concave/curved and not square is because your blade is installed incorrectly or your blade is running in the wrong direction.
Examining the machine’s guides is an important step in evaluating a machine with curve cuts and are not square. If the rear guide is coming into contact with the blade even when it is not cutting, it is likely that the rear guide is placed too forward. This causes the blade to be forced ahead of its natural position on the blade wheels, which might result in curved cuts of worse quality.
Because of this, it is recommended that you check the blade guides before making any adjustments to the wheels. This is because if the rear guide is much out of position, it has the potential to even push the blade off of the wheel crown. After making the necessary adjustments to the guides, you could discover that the blade now tracks appropriately on the wheels.
When the guides exert great pressure against the blade, both the guide and the blade will become extremely hot. Temperatures are high enough to warp the blade and degrade the effectiveness of the side guiding wheel or block. In addition, causing the blade to rub aggressively against the guide is functionally equivalent to asking the blade to wrap around a wheel with a narrow radius, which will result in the blade becoming damaged.
Why won’t my miter cuts line up perfectly?
The reason your miter saw cuts won’t line up perfectly is that the blade of the saw isn’t perpendicular to the base, or you cut one piece too long or too short. Your miter gauge in the wrong position is another reason your miter cuts won’t line up properly.
You either shortened or lengthened one of the pieces. If you cut the piece longer than it needs to be, there will be an overhang on one of the outside corners. Because that is the end of the cut that is thinnest, the overhang can be flexible, which means that it can be folded over just a little bit so that it meets the other piece without any bumps.
This can be accomplished using a screwdriver or the blade of a strong ruler, both of which are metal and have flat surfaces. Be careful, and only exert as much pressure as is necessary to close the space. If there is not much gap, then you should try this method. The gap can be hidden by folding the grain over on itself, and any sanding should be done very softly.
If the saw you are using doesn’t have a blade that is perpendicular to the base, you won’t have your cuts lined perfectly. You will need to use biscuits to provide your additional wood surface to glue because the parts will not align properly for a tight bond.
Add a generous amount of glue to the biscuits so that it covers the entire gap thoroughly and spills over the edges. The next step is to produce a matching wood filler by adding sawdust from the same type of wood, rubbing it in, and allowing it to combine with the glue.
Why is my miter saw not sliding smoothly?
Your miter saw isn’t sliding smoothly because of the lack of lubrication on your saw’s parts or badly worn-out bearings. A dull blade is another reason your miter saw isn’t sliding smoothly.
If you discover that your miter saw isn’t moving as freely or smoothly as it used to, it’s probably time to apply some lubrication, such as oil, grease, or dry graphite. This will allow the saw to move more easily and smoothly. Ensuring the hinges and sliding rails on your miter saw are in good operating order is an important component of miter saw maintenance. Over time, these components are susceptible to accumulating dust and filth.
To keep your miter saw in good working order, you must lubricate it often with the appropriate grease, oil, or graphite. It is essential to ensure that the appropriate lubricant is applied to the appropriate component. That wraps it up! Lubricating your miter saw is straightforward and shouldn’t demand too much of your attention or time. Your work will become much simpler if you take the time to ensure that every component of your miter saw operates fluidly and unobstructed.
Why is my Dewalt miter saw not cutting straight?
Your Dewalt miter saw isn’t cutting straight because of a blade that has deflected badly, or the miter gauge is misaligned. An unstable fence is another reason your Dewalt miter saw isn’t cutting straight.
C clamps can be used to secure the piece to the table’s back fence or to the table’s base plate; alternatively, if your saw comes with clamps specifically designed for this purpose, you can use those. When making a standard cross-cut, holding the piece of wood in place with your free hand is a valid method; however, this tactic does not necessarily work when making a beveled cut. Here are steps to fix your Dewalt miter saw that isn’t cutting straight.
- Hold the saw firmly in place at all times when making cuts.
- Utilizing the appropriate type of blade for the material at hand is going to make a significant impact on the outcome.
- It is important to remember that the blade must always be brought up to its maximum speed before it is used on the substance in question.
Why is my Ryobi miter saw not cutting straight?
The reason your Ryobi miter saw isn’t cutting straight is because your blade has drifted a bit or your gauges are out of line. Your miter saw used wrongly is another reason your Ryobi miter saw isn’t cutting straight.
Take caution when you use your Ryobi miter saw. Take your time when cutting, don’t force the blade, and only use the appropriate blade for the material you’re cutting. Do not force the material against the fence in any way. Here are steps to fix your Ryobi miter saw that isn’t cutting straight.
- Your saw should be allowed to fall into the angle detent and then secured in that position.
- After that, readjust the fence such that a square placed up to the blade displays an angle of 90 degrees.
- If the throat plate gap is not parallel to the blade when the saw is set to 90 degrees, check the underside of the arm assembly to determine if there is any wiggle room for adjustment.
- You might find the other steps in your Ryobi manual.
Also, remember to sharpen and oil your saw. Performing routine maintenance and clearing away accumulated dust and debris will go a long way toward having a straight cut. Ensure that the fence is spotless and that the material may rest evenly.
Check that the blade isn’t dull and doesn’t require any cleaning or replacement before you use it. Taking care of your saw will allow it to serve you for a significantly longer period because even the smallest details build up over time.
Why is my Bosch miter saw not cutting straight?
The reason your Bosch miter saw isn’t cutting straight is because your blade is warped and damaged or your blade was wrongly installed. A fence out of line is another reason your Bosch miter saw isn’t cutting straight.
Here are steps to fix your Bosch miter saw that isn’t cutting straight.
- Before you can adjust the saw blade on your Bosch miter saw, you must first release the bevel handle located at the back of the saw.
- After that, you should adjust the blade’s bevel, so it comes into full contact with the speed square and tighten the handle.
- Adjust the stop bolt to flush the table, and ensure that the saw blade is perpendicular to the table.
- If the bevel is altered and returned to its original setting of 0 (zero), the bolt will halt the blade, bringing it back to a position perpendicular to the table, also known as 90 degrees. Adjust the indicator to point to 0 as the final step (zero).
Sure, you are having trouble aligning the blade with the table. Check to see if the stop bolt is in place. The stop bolt may stop the blade from being changed to a 90-degree angle. After driving the bolt deeper into the table, inspect it to ensure it is square.