To string a one-hole weed eater, measure and cut the appropriate string length, thread the string through the hole, and wind it around the spool. Follow the manufacturer’s guidelines and use the correct string type and size for optimal performance.
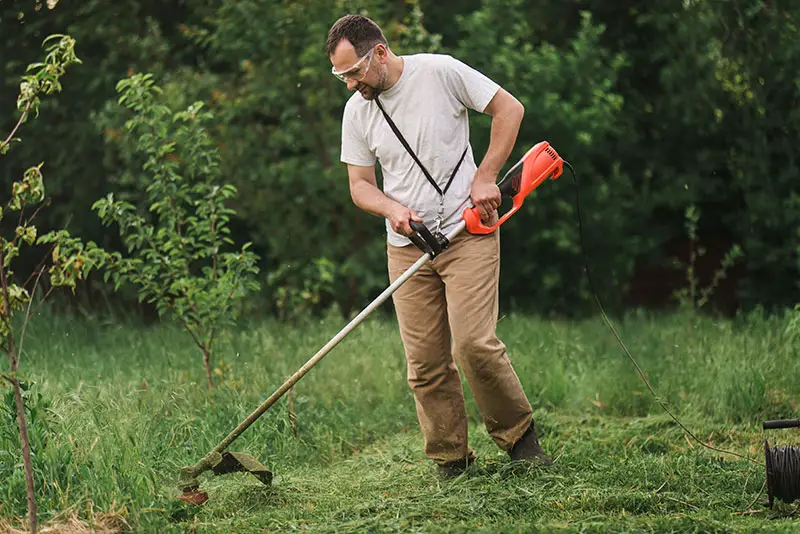
Some weed eaters use a one-hole string system, where the string is fed through a single hole in the trimmer head. These models can be found among both gas and electric-powered weed eaters. Popular brands that offer one-hole string systems include Black & Decker, Ryobi, and Greenworks.
Before attempting to string your weed eater, identify your model and consult the user manual to verify it utilizes a one-hole string system. The manual will also provide specific instructions on stringing your particular model.
Understanding your weed eater model and confirming it uses a one-hole string system is crucial for proper string replacement.
Preparing Your One-Hole Weed Eater for String Replacement
Before restringing your one-hole weed eater, follow these steps to prepare it for the process:
- Disconnect power source: If you’re using an electric or battery-powered weed eater, disconnect it from the power source. If you’re using a gas-powered weed eater, turn off the engine and let it cool down.
- Clean the trimmer head: Remove any debris, grass, or dirt around the trimmer head to ensure smooth string replacement.
- Remove the spool: Press down on the tabs or unscrew the bump knob to remove the spool from the trimmer head. Consult your user manual for specific instructions on removing the spool for your model.
Measuring and Cutting the Appropriate String Length
To ensure optimal performance, measure and cut the correct length of string for your one-hole weed eater. The user manual will typically provide the recommended string length and diameter for your specific model. Follow these general guidelines:
- String diameter: Most one-hole weed eaters use a string with a diameter between 0.065 and 0.095 inches. Thicker string is more durable and suitable for heavy-duty trimming tasks.
- String length: For most models, a length of 15-25 feet is recommended. Using too much or too little string can affect the weed eater’s performance.
Always use the recommended string diameter and length for your specific weed eater model to ensure optimal performance and avoid damaging the trimmer.
Step-by-Step Guide to Stringing a One-Hole Weed Eater
Once you have identified your model and prepared your weed eater, follow these steps to string your one-hole weed eater:
- Thread the string: Feed one end of the string through the hole in the trimmer head, ensuring that the string enters the spool’s inner chamber. Pull the string through until you have an equal amount of string on both sides of the trimmer head.
- Wind the string: Hold the spool with one hand, and with the other hand, wind the string evenly around the spool in the direction indicated by the arrows on the spool. Make sure not to overlap the string layers. Leave about 6 inches of string unwound on each end.
- Reassemble the trimmer head: Align the ends of the string with the eyelets on the trimmer head. Press the spool back into the trimmer head, ensuring that it clicks into place or is secured by the bump knob.
- Test the weed eater: Reconnect the power source or start the engine, and test the weed eater to ensure the string feeds and cuts properly.
| Step | Action |
|---|---|
| 1 | Thread the string |
| 2 | Wind the string |
| 3 | Reassemble the trimmer head |
| 4 | Test the weed eater |
Table: Step-by-Step Guide to Stringing a One-Hole Weed Eater
Tips for Properly Winding One-Hole Weed Eater String
Proper winding of the string is crucial for the weed eater’s performance. Here are some tips to ensure proper winding of the one-hole weed eater string:
- Wind tightly: Ensure that the string is wound tightly around the spool without any slack. Loose winding can cause the string to tangle or jam when in use.
- Maintain even layers: Wind the string in even layers to prevent it from overlapping or bunching up. Overlapping layers can cause uneven feeding and reduce the trimmer’s effectiveness.
- Follow the winding direction: Always follow the winding direction indicated by the arrows on the spool. Winding the string in the wrong direction can cause feeding issues and damage the trimmer.
- Avoid overfilling: Do not use more string than recommended for your weed eater model. Overfilling the spool can lead to poor performance and difficulty in feeding the string.
Proper winding of the weed eater string is essential for optimal performance. Follow the manufacturer’s recommendations and the tips provided above to ensure successful stringing.
Troubleshooting Common One-Hole Weed Eater Stringing Issues
If you encounter issues while stringing your one-hole weed eater, consider these troubleshooting tips:
- String not feeding: If the string is not feeding, check if it is wound in the correct direction and not overlapped or tangled. Also, make sure that the string is the recommended diameter and length for your specific model.
- Uneven cutting: If the weed eater is cutting unevenly, inspect the string for damage or irregular winding. Replace the string if it is damaged or worn.
- Trimmer head not spinning: Ensure that the spool is correctly seated in the trimmer head and that the bump knob is securely fastened. Check for debris or tangled string that may be obstructing the trimmer head’s movement.
| Issue | Troubleshooting |
|---|---|
| String not feeding | Check winding direction, overlapping, and string specifications |
| Uneven cutting | Inspect string for damage or irregular winding |
| Trimmer head not spinning | Check spool seating and bump knob; inspect for debris or tangled string |
Table: Troubleshooting Common One-Hole Weed Eater Stringing Issues
Maintaining and Replacing String on One-Hole Weed Eaters
Proper maintenance and timely replacement of the weed eater string can help prolong its life and ensure optimal performance. Here are some tips for maintaining and replacing string on one-hole weed eaters:
- Regular inspection: Check the string for wear and damage before each use. Replace it if it is worn, frayed, or broken.
- Clean the spool: Clean the spool and trimmer head regularly to remove dirt, grass, and debris that can interfere with the string feeding mechanism.
- Use the right string: Always use the recommended string type, size, and length for your specific weed eater model. Using the wrong string can reduce the trimmer’s efficiency and cause damage to the device.
- Store properly: Store the weed eater and spare string in a cool, dry place to prevent damage and degradation of the string material.
Selecting the Right String for Your One-Hole Weed Eater
Choosing the correct string for your one-hole weed eater is essential for efficient cutting and long-lasting performance. Here are some factors to consider when selecting the right string:
- String diameter: Check your weed eater’s user manual for the recommended string diameter. Common diameters range from 0.065 to 0.095 inches. Thicker string is more durable and suitable for heavy-duty tasks, while thinner string is more suited for light trimming.
- String material: Weed eater string is available in various materials, such as nylon, copolymer, and composite materials. Consider the type of vegetation you’ll be trimming and the manufacturer’s recommendations when selecting the appropriate string material.
- String shape: Weed eater string comes in different shapes, including round, square, twisted, and serrated. Each shape offers different cutting capabilities, with twisted and serrated strings providing more aggressive cutting action.
| String Diameter | Best for |
|---|---|
| 0.065 inches | Light trimming |
| 0.080 inches | Medium-duty trimming |
| 0.095 inches | Heavy-duty trimming |
Table: Choosing the Right String Diameter for Your One-Hole Weed Eater
Understanding Manufacturer Guidelines for One-Hole Weed Eater String
It’s essential to understand and follow the manufacturer’s guidelines for your specific one-hole weed eater model. These guidelines provide information on the appropriate string type, size, and replacement process, ensuring optimal performance and preventing damage to your device. Here are some tips for understanding and following these guidelines:
- Refer to the user manual: The user manual that comes with your weed eater will provide detailed instructions on string replacement and maintenance. Keep this manual handy and refer to it as needed.
- Check the manufacturer’s website: If you’ve misplaced your user manual or need additional information, the manufacturer’s website is a valuable resource. Many manufacturers offer downloadable user manuals, FAQs, and tutorial videos.
- Contact customer support: If you’re unsure about the proper string or replacement process for your one-hole weed eater, contact the manufacturer’s customer support for assistance.
Always follow the manufacturer’s guidelines for your specific one-hole weed eater model to ensure optimal performance and prevent damage.
Key Takeaways
- One-hole weed eaters require a unique stringing process compared to traditional two-hole systems.
- Always refer to the manufacturer’s guidelines and user manual for specific instructions on string replacement and maintenance.
- Proper maintenance and timely replacement of the string are essential for optimal performance and prolonging the life of your weed eater.
Conclusion
Stringing a one-hole weed eater might seem challenging at first, but with the right steps and understanding of your specific model, it becomes an easy task. Follow the manufacturer’s guidelines, use the correct string type and size, and maintain your weed eater regularly to ensure optimal performance and long-lasting use.