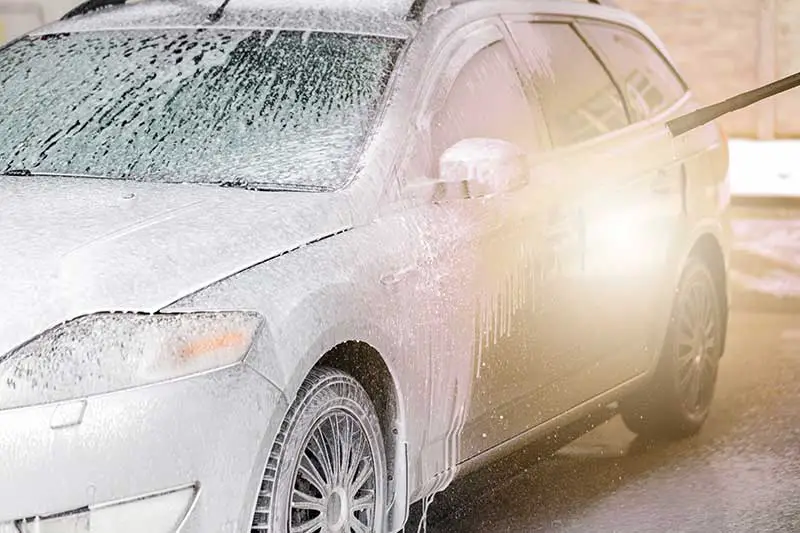
To use a soap dispenser on a pressure washer, choose the appropriate soap, attach the dispenser correctly, adjust the soap dilution and spray settings, and follow best practices for effective soap application. Don’t forget to clean and maintain the dispenser to ensure its longevity.
Selecting the Appropriate Soap
Using the right soap is essential for a successful cleaning experience with your pressure washer. In this section, we’ll discuss the different types of soap and how to choose the best one for your cleaning project.
Types of Pressure Washer Soap
There are three main types of pressure washer soap:
- General-purpose cleaners: These soaps are designed for everyday cleaning tasks like washing cars, cleaning outdoor furniture, and removing dirt from sidewalks.
- Degreasers: These soaps are specifically formulated to break down grease and oil stains on driveways, garage floors, and other surfaces.
- Specialty cleaners: These soaps are made for specific tasks, such as removing mold and mildew or cleaning wood surfaces.
Table: Pressure Washer Soap Types
| Type | Application | Examples |
|---|---|---|
| General-purpose | Cars, furniture, sidewalks | Car wash soap, all-purpose cleaner |
| Degreasers | Grease, oil stains | Driveway cleaner, engine degreaser |
| Specialty cleaners | Specific cleaning tasks | Mold and mildew remover, wood cleaner |
Choose the right type of soap based on your cleaning project.
Always use pressure washer-specific soap to avoid damaging your equipment and surfaces.
How to Choose the Right Soap
When selecting a soap for your pressure washer, consider the following factors:
- Surface compatibility: Ensure the soap is compatible with the surface you’re cleaning. For example, use a car wash soap for vehicles and a wood cleaner for wooden surfaces.
- Eco-friendliness: Opt for biodegradable and phosphate-free soaps to minimize environmental impact.
- Pressure washer compatibility: Check your pressure washer’s user manual to see if there are any specific soap recommendations or restrictions.
Attaching the Soap Dispenser Correctly
Once you’ve chosen the appropriate soap, it’s time to attach the soap dispenser to your pressure washer. Follow these steps to ensure a proper connection:
Step 1: Turn Off the Pressure Washer
Always turn off your pressure washer and disconnect it from the water source before attaching the soap dispenser.
Step 2: Locate the Soap Dispenser Attachment
Find the soap dispenser attachment on your pressure washer. This is usually a small container or bottle designed to hold the soap solution. Some models come with a built-in soap dispenser, while others require an external attachment.
Step 3: Mix the Soap Solution
Following the soap manufacturer’s instructions, mix the soap solution in the dispenser. Typically, this involves diluting the soap with water.
Don’t use undiluted soap, as it can damage your pressure washer and the surface you’re cleaning.
Step 4: Attach the Soap Dispenser
Connect the soap dispenser to the pressure washer according to your model’s user manual. This may involve screwing the container onto the pressure washer, attaching a hose, or connecting a separate accessory.
Step 5: Connect the Appropriate Nozzle
Attach the low-pressure nozzle (usually marked with a black or blue color) to your pressure washer’s wand. This nozzle is designed to apply soap at a low pressure, ensuring an even and thorough coverage.
Adjusting Soap Dilution and Spray Settings
To get the best cleaning results, it’s essential to adjust the soap dilution and spray settings on your pressure washer. This section will guide you through the process.
Adjusting Soap Dilution
Follow these steps to adjust the soap dilution in your soap dispenser:
- Read the soap manufacturer’s instructions: Check the recommended dilution ratio for your soap. This information is usually found on the product label or the manufacturer’s website.
- Measure the soap and water: Use a measuring cup to accurately measure the soap and water according to the recommended ratio.
- Mix the solution: Pour the soap and water into the soap dispenser and mix them thoroughly. Ensure there are no undissolved soap particles, as they can clog the dispenser.
Properly diluted soap ensures optimal cleaning performance and protects your pressure washer from damage.
Adjusting Spray Settings
Adjust the spray settings on your pressure washer to achieve the desired cleaning results:
- Choose the right nozzle: As mentioned earlier, use the low-pressure nozzle (black or blue) for applying soap. This nozzle sprays soap at a wider angle and lower pressure, ensuring even coverage.
- Adjust the pressure: If your pressure washer has an adjustable pressure setting, start with a low pressure and increase it gradually if necessary. High pressure can damage surfaces and strip paint.
- Test the spray pattern: Before applying soap to the entire surface, test the spray pattern on a small, inconspicuous area. Adjust the nozzle or wand distance from the surface to achieve the desired coverage.
Tips for Effective Soap Application
To get the most out of your pressure washer’s soap dispenser, follow these tips for effective soap application:
- Pre-wet the surface: Before applying soap, wet the surface with water to help the soap spread evenly and adhere better.
- Apply soap from the bottom up: Start applying soap from the bottom of the surface and work your way up. This prevents streaks and ensures a more even coverage.
- Allow the soap to dwell: Let the soap sit on the surface for a few minutes (as per manufacturer’s instructions) to break down dirt and grime. Avoid letting the soap dry, as it can leave residue and be difficult to rinse off.
- Use a brush for stubborn stains: If you encounter stubborn stains or heavily soiled areas, use a pressure washer-compatible brush to scrub the surface while applying soap.
- Rinse thoroughly: After the soap has done its job, switch to a high-pressure nozzle (such as a green or yellow one) and rinse the surface from the top down, ensuring all soap residue is removed.
Cleaning and Maintaining the Soap Dispenser
Proper cleaning and maintenance of your soap dispenser will extend its lifespan and ensure optimal performance. Follow these steps to keep your soap dispenser in good working order:
- Empty the soap dispenser: After each use, empty any remaining soap solution from the dispenser. This prevents the soap from drying out and clogging the dispenser.
- Rinse with clean water: Fill the soap dispenser with clean water and run it through your pressure washer to flush out any remaining soap residue. This helps prevent clogs and keeps the dispenser clean.
- Inspect and clean the filter: Most soap dispensers have a small filter or screen to prevent debris from entering the pressure washer. Check the filter regularly and clean it as needed.
- Store the soap dispenser properly: When not in use, store the soap dispenser in a cool, dry place away from direct sunlight. This will protect the dispenser from damage and extend its lifespan.
- Check for damage and wear: Regularly inspect your soap dispenser for signs of damage or wear. If you notice any issues, replace the dispenser or the affected parts to ensure optimal performance.
Troubleshooting Common Soap Dispenser Issues
If you encounter problems with your soap dispenser, these troubleshooting tips may help you resolve them:
Soap not dispensing: If soap isn’t being dispensed, check the following:
- Ensure the soap dispenser is properly connected to the pressure washer.
- Verify the soap solution is mixed correctly and not too thick.
- Inspect the filter for clogs or debris.
- Make sure you’re using the correct low-pressure nozzle for soap application.
Uneven soap application: If the soap isn’t being applied evenly, try these steps:
- Adjust the nozzle or wand distance from the surface for better coverage.
- Check the soap dilution and adjust it if necessary.
- Ensure the pressure washer is operating at the correct pressure.
Soap residue or streaks: If you notice soap residue or streaks after rinsing, consider these solutions:
- Rinse the surface more thoroughly, starting from the top and working your way down.
- Adjust the soap dilution to ensure it’s not too concentrated.
- Make sure the soap isn’t drying on the surface before rinsing.
Key Takeaways
- Choose the appropriate soap for your cleaning project and pressure washer.
- Attach the soap dispenser correctly, following your pressure washer’s user manual.
- Adjust the soap dilution and spray settings for optimal cleaning performance.
- Follow tips for effective soap application and proper rinsing.
- Clean and maintain your soap dispenser to ensure its longevity.
- Troubleshoot common soap dispenser issues for a smooth cleaning experience.
Conclusion
Using a soap dispenser with your pressure washer can make cleaning tasks more efficient and effective. By selecting the right soap, attaching the dispenser correctly, adjusting settings, and following best practices, you’ll enjoy a successful cleaning experience. Remember to clean and maintain your soap dispenser, and troubleshoot any issues that may arise.