To sharpen a lawn mower blade, remove the blade, use a file or grinder to sharpen the cutting edge, balance the blade, and reinstall it. Perform regular maintenance and replace the blade when necessary.
Signs of a Dull Lawn Mower Blade
Uneven or jagged grass cuts, uncut patches of grass, and a decline in mower performance are common signs of a dull lawn mower blade. When the blade is dull, it tends to tear the grass instead of providing clean, even cuts. This may lead to a less visually appealing lawn and may also make the grass more susceptible to diseases and pests.
“A dull lawn mower blade can lead to uneven grass cuts, uncut patches, and increased susceptibility to diseases and pests.”
Tools and Equipment for Blade Sharpening
To sharpen a lawn mower blade, you’ll need the following tools and equipment:
- Work gloves and safety goggles
- A socket wrench or a pair of pliers
- A clamp or a vice
- A metal file or bench grinder
- Blade balancer or nail
Table: Blade Sharpening Tools and Equipment
| Tool/Equipment | Purpose |
|---|---|
| Work gloves | Protect your hands during the sharpening process |
| Safety goggles | Protect your eyes from flying debris and sparks |
| Socket wrench | Remove and reinstall the lawn mower blade |
| Clamp or vice | Secure the blade during sharpening |
| Metal file | Manually sharpen the blade |
| Bench grinder | Mechanically sharpen the blade |
| Blade balancer | Ensure the blade is balanced for optimal performance |
Remember, always prioritize safety and follow the manufacturer’s guidelines for using these tools and equipment.
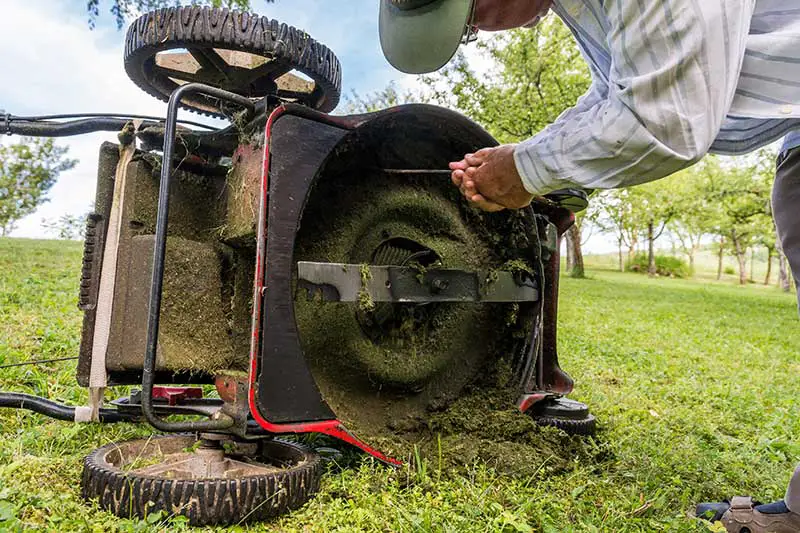
Preparing Your Lawn Mower for Blade Sharpening
Before you begin sharpening the lawn mower blade, it’s essential to prepare the mower properly. Follow these steps to ensure safety and ease of access to the blade:
- Disconnect the spark plug wire to prevent accidental engine ignition.
- Empty the fuel tank or use a fuel stabilizer to avoid fuel spillage.
- Turn the lawn mower on its side with the carburetor facing up to prevent oil leakage.
“Always disconnect the spark plug wire and empty the fuel tank before sharpening the blade to ensure safety.”
Removing the Blade for Safe Sharpening
With the lawn mower properly prepared, it’s time to remove the blade. Follow these steps to remove the blade safely:
- Wear work gloves to protect your hands from sharp edges.
- Use a block of wood or similar object to wedge between the blade and mower deck to prevent the blade from moving.
- Use a socket wrench or pliers to loosen and remove the bolt or nut securing the blade to the mower.
Table: Removing the Blade for Sharpening
| Step | Description |
|---|---|
| 1 | Wear work gloves |
| 2 | Wedge a block of wood between the blade and deck |
| 3 | Loosen and remove the bolt or nut |
Keep track of all hardware removed, as you’ll need them to reinstall the blade later.
Step-by-Step Lawn Mower Blade Sharpening Process
Once you have the blade removed, follow these steps to sharpen it:
- Secure the blade in a vice or clamp to keep it stable during sharpening.
- Using a metal file or angle grinder, sharpen the blade by following the existing bevel angle. File in one direction away from your body to maintain consistency in the sharpening process.
- Check for even sharpness along the entire edge of the blade. A properly sharpened blade should be sharp but not razor-sharp, as this can cause the blade to dull quickly.
“Sharpen the lawn mower blade by following the existing bevel angle and maintaining consistent strokes with a metal file or angle grinder.”
Balancing the Blade for Optimal Performance
After sharpening the blade, it’s crucial to balance it for optimal performance. An unbalanced blade can cause vibration and uneven cutting, reducing your mower’s efficiency and potentially damaging the engine.
- Use a blade balancer or a nail in a wall to balance the blade. Place the blade’s center hole on the balancer or nail.
- Observe if one side of the blade tilts downward. If it does, it means that side is heavier, and you need to remove a bit more material from the heavier side.
- Continue the sharpening and balancing process until the blade stays level on the balancer or nail.
Table: Balancing the Blade
| Step | Description |
|---|---|
| 1 | Place the blade on a blade balancer or a nail |
| 2 | Identify the heavier side if the blade tilts |
| 3 | Remove material from the heavier side until the blade levels |
Reinstalling the Sharpened Blade
Once you’ve sharpened and balanced the blade, it’s time to reinstall it on your lawn mower. Follow these steps to ensure proper installation:
- Position the blade correctly, ensuring that the cutting edge faces the direction of the mower’s rotation.
- Replace the blade, washer, and bolt or nut, securing them tightly with a wrench or socket.
- Lower the mower back to the ground, reconnect the spark plug wire, and start the mower to ensure proper operation.
“When reinstalling the sharpened blade, make sure the cutting edge faces the direction of the mower’s rotation and secure it tightly with a wrench or socket.”
Safety Tips for Lawn Mower Blade Maintenance
Safety should be a top priority when performing any maintenance on your lawn mower. Here are some safety tips to consider:
- Always disconnect the spark plug wire before performing maintenance to prevent accidental starting.
- Wear appropriate safety gear, including gloves and eye protection.
- Ensure the mower is on a flat, stable surface and use a mower lift or sturdy support when working underneath the mower.
- When sharpening the blade, use slow, steady strokes, and maintain a firm grip on the file or grinder to avoid slips.
Table: Lawn Mower Blade Maintenance Safety Tips
| Tip | Description |
|---|---|
| 1 | Disconnect the spark plug wire |
| 2 | Wear safety gear |
| 3 | Work on a flat, stable surface and use support |
| 4 | Maintain a firm grip and use slow, steady strokes when sharpening |
Scheduling Regular Blade Sharpening
To keep your lawn mower operating efficiently, it’s important to establish a regular blade sharpening schedule. Most experts recommend sharpening the blade at least once or twice per season, depending on the size of your lawn and the frequency of mowing. If you mow often or have a large lawn, you may need to sharpen more frequently. Regularly inspect the blade for signs of wear and damage, and sharpen as needed.
“Sharpen your lawn mower blade at least once or twice per season, or more frequently if you have a large lawn or mow often.”
Table: Recommended Blade Sharpening Frequency
| Lawn Size and Mowing Frequency | Suggested Blade Sharpening Frequency |
|---|---|
| Small lawn, mowed infrequently | Once per season |
| Medium lawn, mowed regularly | Twice per season |
| Large lawn, mowed often | As needed, based on blade inspection |
Recognizing When to Replace Lawn Mower Blades
While sharpening your lawn mower blade can extend its life, there will come a time when you need to replace it. Here are some signs that it’s time for a new blade:
- Deep nicks or bends in the blade that can’t be repaired by sharpening
- Cracks or other signs of structural damage
- Excessive thinning of the blade’s metal after multiple sharpenings
- The blade no longer cuts grass cleanly, even after sharpening
“Replace your lawn mower blade when it has deep nicks, cracks, excessive thinning, or no longer cuts grass cleanly after sharpening.”
Table: Signs It’s Time to Replace Lawn Mower Blades
| Sign | Description |
|---|---|
| Deep nicks | Irreparable damage that can’t be fixed by sharpening |
| Cracks | Structural damage that compromises blade integrity |
| Thinning | Blade metal has become too thin due to multiple sharpenings |
| Poor cutting | Blade no longer cuts grass cleanly, even after sharpening |
Recognizing When to Replace Lawn Mower Blades
Sharpening your lawn mower blade can extend its life, but eventually, the blade will need to be replaced. Here are some signs that it’s time for a new blade:
- Excessive wear or thinning of the blade, making it more prone to bending or breaking.
- Deep nicks or gouges in the blade, which can’t be fixed by sharpening.
- A blade that no longer holds a sharp edge after multiple sharpening attempts.
- A blade that’s out of balance even after attempts to balance it.
“Replace your lawn mower blade when it’s excessively worn, has deep nicks or gouges, can’t hold a sharp edge, or is out of balance.”
Table: Signs It’s Time to Replace Lawn Mower Blades
| Sign | Description |
|---|---|
| Excessive wear or thinning | Blade is more prone to bending or breaking |
| Deep nicks or gouges | Can’t be fixed by sharpening |
| Blade doesn’t hold a sharp edge | Indicates the blade has reached the end of its useful life |
| Blade is out of balance | Affects mower performance and can cause damage to the engine or mower deck |
Key Takeaways
- Regularly inspect your lawn mower blade for signs of wear, such as torn or uneven grass.
- Use appropriate tools and equipment for blade sharpening, such as a file, angle grinder, or bench grinder.
- Follow a step-by-step process for sharpening, including removing the blade, sharpening the cutting edge, and balancing the blade.
- Prioritize safety when working with lawn mower blades, and schedule regular blade maintenance.
Conclusion
Sharpening a lawn mower blade is an essential part of lawn mower maintenance. By following the right steps, using the correct tools, and prioritizing safety, you can keep your lawn mower running efficiently and effectively. Remember to sharpen your blade regularly, and replace it when necessary, to maintain optimal performance.