To remove a weed eater head, follow safety precautions, identify the head type, and consult the manufacturer’s guidelines for your specific model. Address common issues like line feeding, head spinning, and cutting performance to maintain optimal weed eater function.
Safety Precautions for Weed Eater Head Removal
Before removing the weed eater head, it’s essential to prioritize safety. Follow these safety precautions to avoid accidents and damage to your equipment:
- Disconnect the power source: If you have an electric weed eater, unplug it from the power outlet. For gas-powered weed eaters, turn off the engine and remove the spark plug to prevent accidental ignition.
- Wear protective gear: Use safety goggles and gloves to protect your eyes and hands from debris or sharp parts.
- Work on a stable surface: Place the weed eater on a flat, stable surface to prevent it from moving or falling while you work.
Identifying and Understanding Weed Eater Head Types
Different weed eater models have various head types that require specific removal techniques. Familiarize yourself with the head type on your weed eater to ensure proper removal.
| Weed Eater Head Types | Description |
|---|---|
| Bump Feed | Uses a spring-loaded mechanism to release more line when you “bump” the head on the ground. |
| Automatic Feed | Automatically feeds line as it wears down, without the need for manual adjustment. |
| Fixed Line | Holds pre-cut lengths of line that you manually replace as needed. |
Table: Common weed eater head types and their descriptions.
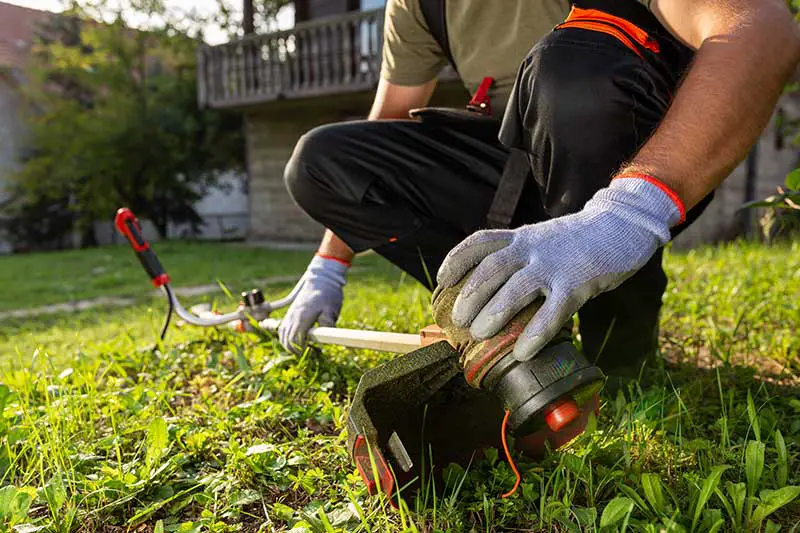
Step-by-Step Guide to Removing Weed Eater Head
The process of removing a weed eater head may vary slightly depending on the model and head type. Here is a general step-by-step guide:
- Secure the weed eater: Place the weed eater on a flat surface with the head facing up.
- Lock the shaft: Locate the hole or button on the shaft that prevents it from rotating. Insert a screwdriver or the provided locking tool to lock the shaft in place.
- Remove the retaining cap or nut: Unscrew the retaining cap or nut in the center of the weed eater head. Most weed eater heads have a left-handed thread, so turn it clockwise to loosen and remove it.
- Remove the head: Once the retaining cap or nut is removed, lift the weed eater head off the shaft.
Remember that most weed eater heads have a left-handed thread, so turn the retaining cap or nut clockwise to loosen it.
Common Weed Eater Head Removal Challenges
You may encounter challenges when removing the weed eater head, such as:
- Stuck or rusted retaining nut: Apply a penetrating oil like WD-40 to help loosen the nut. Allow it to sit for several minutes before attempting to unscrew it.
- Damaged or stripped threads: If the threads are damaged, it may be challenging to remove the retaining nut. Use pliers or a pipe wrench to gain extra leverage and carefully unscrew the nut.
- Misaligned or damaged locking mechanism: If the shaft locking mechanism is not functioning correctly, consult your owner’s manual or contact the manufacturer for guidance.
Proper Maintenance and Cleaning of Weed Eater Head
Regular maintenance and cleaning of your weed eater head can extend its lifespan and ensure optimal performance. Here are some tips for maintaining and cleaning your weed eater head:
- Clean after each use: Remove grass, weeds, and debris from the head and cutting line after each use to prevent buildup.
- Inspect for damage: Check the head for cracks, wear, or damage regularly. Replace it if needed.
- Lubricate moving parts: Apply a light lubricant to any moving parts or bearings to reduce friction and wear.
- Replace worn or damaged parts: Inspect the cutting line, spool, and other components regularly. Replace them as needed to ensure proper functioning.
Table: Weed Eater Head Maintenance Tips
| Maintenance Task | Frequency | Importance |
|---|---|---|
| Clean after each use | Each use | Prevents buildup |
| Inspect for damage | Weekly | Ensures safety and performance |
| Lubricate moving parts | Monthly | Reduces friction and wear |
| Replace worn or damaged parts | As needed | Ensures optimal functioning |
Caption: Keep your weed eater head in good working condition with these maintenance tips.
Replacing a Damaged or Worn Weed Eater Head
Replacing a damaged or worn weed eater head is crucial for maintaining optimal performance and safety. Follow these steps to replace the head:
- Remove the old head: Follow the steps in the “Step-by-Step Guide to Removing Weed Eater Head” section to remove the old head.
- Choose a replacement head: Purchase a new head that is compatible with your weed eater model. Consult your owner’s manual for recommendations.
- Attach the new head: Align the new head with the shaft and slide it into place. Secure it by tightening the retaining cap or nut counterclockwise.
- Check for proper installation: Ensure the new head is securely attached and rotates freely without any obstruction.
Upgrading Your Weed Eater Head for Improved Performance
Upgrading your weed eater head can provide better cutting performance, reduced line breakage, and easier line replacement. There are several aftermarket weed eater head options available that can improve your trimming experience. Consider the following factors when choosing an upgrade:
- Compatibility: Make sure the upgraded head is compatible with your weed eater model.
- Ease of use: Look for heads with user-friendly features, such as easy line replacement systems or automatic line feed mechanisms.
- Durability: Choose a head made from high-quality materials that can withstand regular use and resist wear and tear.
- Cutting performance: Opt for a head that offers improved cutting performance, such as one with dual lines or serrated lines for better cutting efficiency.
“Upgrading your weed eater head can provide better cutting performance, reduced line breakage, and easier line replacement.”
Tips for Prolonging Weed Eater Head Lifespan
Prolonging the lifespan of your weed eater head can save you time and money on replacements. Here are some tips to help extend the life of your weed eater head:
- Avoid hard surfaces: Avoid trimming against hard surfaces, such as concrete or brick, as this can cause the head and cutting line to wear out more quickly.
- Trim at the correct height: Trimming at the proper height reduces the strain on the head and cutting line, prolonging their lifespan.
- Use the right cutting line: Use the recommended cutting line size and type for your weed eater model to reduce the risk of breakage and excessive wear.
- Store properly: Store your weed eater in a cool, dry place to prevent rust and damage.
Table: Tips for Prolonging Weed Eater Head Lifespan
| Tip | Benefit |
|---|---|
| Avoid hard surfaces | Reduces wear and tear |
| Trim at the correct height | Less strain on head and line |
| Use the right cutting line | Reduces breakage and wear |
| Store properly | Prevents rust and damage |
Caption: Follow these tips to prolong the lifespan of your weed eater head.
Understanding Manufacturer Guidelines for Weed Eater Head Removal
Before removing or replacing your weed eater head, it’s crucial to consult the manufacturer’s guidelines for your specific model. These guidelines will provide you with detailed instructions and safety precautions to ensure proper removal and installation. Some common elements you may find in manufacturer guidelines include:
- Required tools: Some weed eater models may require specific tools for head removal, such as wrenches or pliers.
- Disassembly instructions: The guidelines will outline the proper steps to disassemble the weed eater head, which may vary depending on the model.
- Reassembly instructions: Once the old head is removed, the manufacturer’s guidelines will provide step-by-step instructions for installing the new head or reassembling the existing one.
- Maintenance tips: The guidelines may also include tips for maintaining the weed eater head to ensure optimal performance and longevity.
Troubleshooting Common Weed Eater Head Issues
Even with proper maintenance and care, you may encounter issues with your weed eater head. Here are some common problems and their possible solutions:
- Line not feeding: If the cutting line isn’t feeding properly, check for tangled or jammed line inside the head. If necessary, remove the head, clear any obstructions, and reload the line following the manufacturer’s instructions.
- Head not spinning: If the head isn’t spinning, the drive shaft or gearbox may be damaged. Inspect these components for damage and replace them as needed.
- Excessive vibration: Excessive vibration can be caused by an unbalanced head or a damaged cutting line. Check the head for damage, and replace the cutting line if it’s worn or frayed.
- Poor cutting performance: If your weed eater isn’t cutting effectively, the cutting line may be too short, the head may be damaged, or the engine may be running at low speed. Check the cutting line, inspect the head, and ensure the engine is running at full throttle.
Table: Troubleshooting Common Weed Eater Head Issues
| Issue | Possible Solution |
|---|---|
| Line not feeding | Check for tangled or jammed line |
| Head not spinning | Inspect drive shaft and gearbox for damage |
| Excessive vibration | Check head for damage and replace cutting line |
| Poor cutting | Check cutting line, head, and engine speed |
Caption: Common weed eater head issues and possible solutions.
Key Takeaways
- Always follow safety precautions when working with weed eaters, including wearing protective gear and disconnecting the power source before removing the head.
- Familiarize yourself with different weed eater head types to ensure you follow the correct removal and installation process.
- Follow a step-by-step guide for removing and installing weed eater heads, but always consult the manufacturer’s guidelines for your specific model.
- Maintain and clean your weed eater head regularly to prolong its lifespan and ensure optimal performance.
- Troubleshoot common weed eater head issues by checking the cutting line, inspecting the head, and making sure the engine is running at full throttle.
Conclusion
Removing a weed eater head can be a straightforward process when you follow proper safety precautions, consult the manufacturer’s guidelines, and use the right tools. Understanding the various weed eater head types and addressing common issues will help you keep your weed eater in top working condition. Regular maintenance, proper cleaning, and timely replacement of worn or damaged parts will ensure a long-lasting and efficient weed eater.