Why is my bench grinder not turning on?
The reason your bench grinder is not turning on is because of a broken or burned-out power cord that needs to be replaced, a broken switch that can happen that isn’t turning on, or a damaged capacitor if it’s cooked. A worn-out or damaged power cord plug or motor can also cause your bench grinder not to turn on.
Broken or burned out power cords
If your bench grinder isn’t turning on, check the power cords, if it’s broken or burnt out, then your bench grinder won’t turn on as the cords work as a source of power.
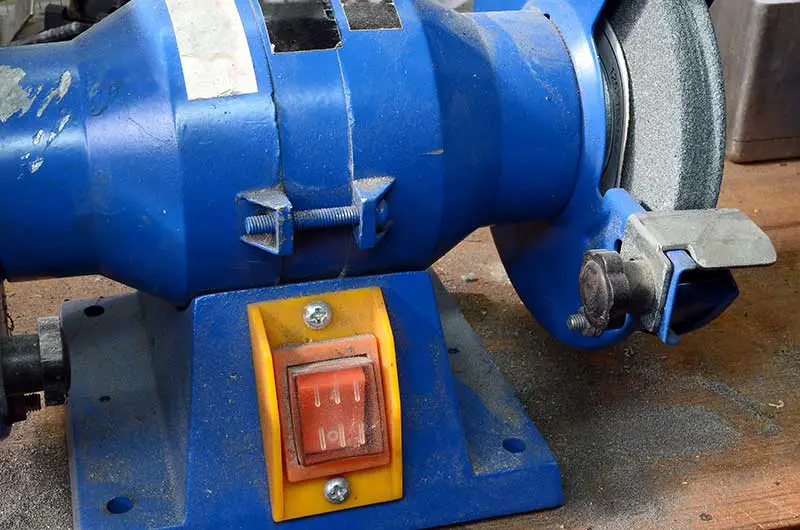
Broken switch
If the switch of your bench grinder is broken, you can’t be able to switch it on hence the bench grinder won’t turn on. In such a case you can replace the switch with a new one.
Faulty capacitor
If your bench grinder’s capacitor is damaged it won’t turn on, as the capacitor activates the motor to run with the energy it has stored.
Worn out or damaged power cord plug
The plug on the power cord of your bench grinder can wear out or gets damaged overtime causing your bench grinder not to turn on when plugged into the electrical socket.
A burned out motor
If the motor of your bench grinder is burned out, it can trip the circuit breaker of the power source and can cause your bench grinder not to turn on.
How to fix a bench grinder that’s not turning on
To fix a bench grinder that’s not turning on, you can replace the power cord and the switch if they are broken. You can replace the capacitor if it’s defective, repair the motor if its burned out, or replace a worn out or damaged power cord plug.
Replace the broken or burned out power cord
You will have to replace the power cords of your bench grinder if it’s burned out or broken. Follow the steps below to replace the power cords of your bench grinder.
- Remove the screw retaining the cord clamp using a screw driver, and then remove the screw clamp.
- Next, lift the cords and switch the assembly out of the handle, and then disconnect the cord from the switch by removing the screws.
- Pull the cords from the bench grinder and now you are ready to install the new power cord.
- Purchase a new power cord from your local electrical store. It costs around $37.
- Next, trim the new cord wires before reassembling your bench grinder.
Replace the switch
Replace the switch of your bench grinder if it’s broken. Follow the steps below to replace the switch of your bench grinder.
- Unplug the bench grinder from the power source.
- Remove the parts such as the handle and the guards so as to be able to access the switch.
- Place the switch in an off position and push forward on the push lever so as to be able to remove the switch.
- You are now ready to install a new switch. Purchase a new switch from your local auto store, it costs between $10-$16.
- Follow the manual provided by the manufacturer for further instructions.
Replace the defective capacitor
Check the capacitor of your bench grinder, if there is failure or its defective replace it. Follow the steps below to replace the defective capacitor.
- Unplug your bench grinder from your power.
- Remove the two wires on one end of the old capacitor and then reattach them to the new one.
Repair a burned-out motor
Test your bench grinder’s motor, if its burned out you can repair it by rewinding the motor. Rewinding process generally involves cutting the original winding out of the motor’s stator and replacing them with new coils made of the same basic type and gauge. Follow the steps below to replace a burned-out motor.
- Clean the working surface using a piece of cloth to prevent dust and debris to get into the motor’s housing.
- Remove the motor from your bench grinder.
- Remove the motors outer housing by unfastening the screws using a screw driver so as to see the motor’s internal primary components, the stator, armature, and the windings.
- Take a few picture of the inside of the motor from different angles so as to remember how each of the main components is arranged.
- Remove the armature of the stator by hand. Once you have removed the armature and the stator, place the housing aside where it won’t attract stray metal pieces.
- Using a screw driver pull up gently on the handle, underneath the metal tabs to loosen the coiled wires.
- Cut out the old winding using a pair of wire cutters.
- Pull the cut coils out of the armature or stator by hand.
- Replace the insulation paper lining the stator if it’s burned or damaged.
- Rewind the armature or stator using the same gauge of wire. The wires in the new coil should be of the same thickness and have the same number of winds as the original windings.
- Once you have successfully rewound your motor, reassemble it.
- Reinstall the motor back into the bench grinder and test it out.
Replace a worn out or damaged power cord plug
If the power cord plugs of your bench grinder are worn out or damaged you can get a replacement plug and attach it yourself. Follow the steps below to replace a damaged or worn out power cord plug.
- Purchase a replacement pug end from hardware store in the electrical section. It costs around $ 0.5-$1.5.
- Unplug the cord from the electrical socket before starting.
- Using a wire cutter, cut straight through the wire just below the base of the plug to detach the old plug.
- Using a wire stripper, strip off ¾ in (1.9 cm) the cord’s jacket, then slide the jackets off to expose to the wires underneath.
- Separate the wires and strip off ½ in (1.3 cm) the insulation of each wire to expose the copper underneath using a wire stripper.
- Bent the copper portion of each wire backwards to make attaching them to the new plug much easier.
- Unscrew the housing of the replacement plugs.
- Loosen the terminal screw inside the plug using a screw driver.
- Tuck each wire into the corresponding terminal.
- With the wires in place, tighten the screws to hold the wires in position.
- Reassemble the plug house.
Why your bench grinder has no power?
The reason your bench grinder has no power is because it’s overloaded with heavy duties, or shorted windings that can happen if they can’t be able to accelerate your bench grinder to the top speed. A damaged motor can also cause your bench grinder to lack power.
Overloaded with heavy duties
Your bench grinder can’t have power. This could be ¼ HP bench grinder which is not powerful enough hence looses power with any decent amount of pressure applied on the wheel. It is suitable for lightest of uses such as sharpening a screw driver or a kitchen knife and it could even barely sharpen a nail.
You will need to purchase at least a ½ HP bench grinder for serious of uses, and a ¾ HP or 1 HP is even better.
Shorted windings
If the windings of your bench grinder are shorted, it can’t have power to run fully up to its normal speed as the windings can’t be able to accelerate it to the top speed. You can fix this by replacing the motor or a rewind.
Damaged motor
A motor can get damaged due to overheating, contamination from foreign substances that finds its way inside the motor, vibration, or electrical overload hence causing your bench grinder to lose power.
To prevent your motor from being damaged, you can install electrical effective over-current protection to prevent electrical overload, keep the motor as cool as possible to prevent overheating, ensure the motor is placed on a flat, stable surface to reduce vibration, keep working areas clean to prevent contamination from entering the motor.
If the motor is damaged you can fix it by rewinding it or replacing it with a new one. a new motor costs between $40-$69.
Why my bench grinder’s motor is stalling?
The reason your bench grinder’s motor is stalling is because of a cooked capacitor that can happen if too much power is applied on it for too long, or incorrect line voltage that can be caused by both high and low voltage. An overloaded motor can also cause your bench grinder’s motor to stall.
Cooked capacitor
A capacitor can get cooked causing your bench grinder’s motor to stall because of applying too much power to the capacitor for too long, which results in the centrifugal switch closing as they can only take a small application of the AC which drives the motor.
You can fix this by replacing the capacitor with a new one.
Incorrect line voltage
Incorrect line voltage can cause your bench grinder’s motor to stall as both high and low voltage affects the motor performance. Both over voltage and under voltage are dangerous for your bench grinder’s health, hence a regulated voltage supply is necessary to avoid your bench grinder’s motor from stalling.
You can fix this by checking the line for proper voltage or you can also use an on load tap changer with transformer to achieve voltage regulation.
Overloaded motor
When you overload your bench grinder’s motor by using it for other tasks than what it’s meant for it can stall. Depending on the bond and the grade of the grinding wheel it may be used to sharpen cutting tools such as tool bits, drill bits, or chisels.
A wire brush wheel can be used in place of the grinding wheels in order to polish work pieces so as to avoid overloading the motor.