Maintaining your weed eater is essential for optimal performance and longevity. Regularly cleaning, changing oil, checking and replacing filters, spark plugs, fuel lines, carburetor, blades, belts, and storing it properly can ensure that your weed eater runs smoothly and efficiently.
Let me tell you, a well-maintained weed eater is a beautiful thing. Not only does it make your yard look neat and tidy, but it also saves you time and money in the long run. But how do you keep your weed eater in tip-top shape? Well, grab a cold one and let’s dive in.
Keep it clean
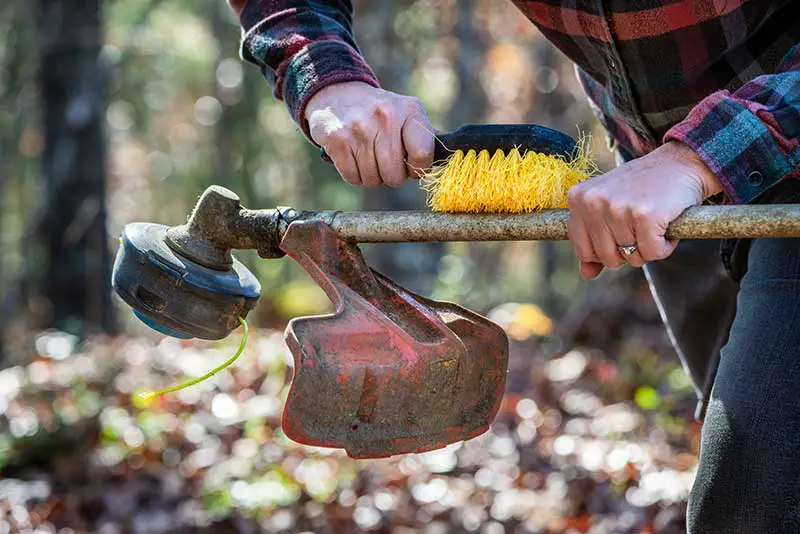
The first and most important step in maintaining your weed eater is to keep it clean. Grass clippings, dirt, and debris can build up on the exterior of the machine, as well as in the air filter, muffler, and other internal parts. A dirty weed eater can cause all sorts of problems, from clogged air filters to worn-out spark plugs. To clean your weed eater, use a rag or brush to remove any built-up grass and debris, and be sure to wipe down the exterior as well. Pay special attention to the air filter and make sure it’s clean. A clogged air filter can restrict airflow, causing your engine to run poorly and lose power.
Keeping your weed eater clean is essential for maintaining its optimal performance. Here’s how you can do it:
- First, make sure to turn off your weed eater and unplug it before you start cleaning.
- Use a brush or rag to remove any grass clippings, dirt, or debris that may be stuck to the exterior of the machine. This is important because these can clog the air filter and muffler, which can cause your weed eater to run poorly.
- Use a soft brush and some soapy water to clean the air filter. The air filter is an important component that keeps dirt and debris out of the engine. Make sure to remove any dirt or debris that may have accumulated on it.
- Use a damp rag to wipe down the exterior of the machine, including the handlebars, shaft, and cutting head. This will remove any remaining dirt or debris that may be stuck to the machine.
- Use a dry rag to wipe down the machine, making sure to remove any remaining moisture. This is important to prevent rust and corrosion.
- Check the muffler and remove any debris that may have accumulated inside. The muffler is an important component that helps to reduce the noise of the engine, and any debris that may be inside can restrict the airflow and affect its performance.
- Reassemble the weed eater and store it in a dry, protected area. This will help to keep it in good condition and prevent any damage from moisture and extreme temperatures.
By regularly cleaning your weed eater, you can prevent dirt and debris from building up and causing damage to internal parts. This will help ensure that your weed eater runs smoothly and efficiently, making your lawn look neat and tidy.
Change the oil
Just like your car, your weed eater needs regular oil changes to keep it running smoothly. Check your owner’s manual for the recommended oil type and change interval, but a good rule of thumb is to change the oil every 50 hours of use or once a year, whichever comes first. Using the correct oil is also important. Always use a high-quality, 2-stroke oil specifically designed for air-cooled engines. Failure to use the correct oil can cause damage to your engine and void the warranty.
To keep your weed eater running smoothly, it’s important to change the oil regularly. Here’s how you can do it:
- Start by consulting the owner’s manual for the recommended oil type and change interval.
- Locate the oil fill cap, usually located near the base of the engine.
- Use a clean container to drain the old oil by removing the oil fill cap and allowing the oil to flow into the container. Be sure to dispose of the used oil properly.
- Once all the oil has been drained, replace the oil fill cap.
- Using a clean, high-quality 2-stroke oil specifically designed for air-cooled engines, pour the new oil into the oil fill cap, and make sure not to overfill.
- Wipe any spills with a clean rag and start the engine, let it run for a few minutes to circulate the new oil.
- Check the oil level again, and add more oil if necessary.
By regularly changing the oil, you can ensure that your weed eater’s engine is lubricated properly, which will prolong the life of the engine and prevent damage. It’s also important to use the correct oil type and change it at the recommended intervals to keep your weed eater running smoothly.
Check the air filter
The air filter is responsible for keeping dirt and debris out of your weed eater’s engine. Over time, it can get clogged, which can restrict airflow and cause your weed eater to run poorly. Check your air filter every 25 hours of use or once a season, and clean or replace it as needed. A dirty air filter can cause your engine to run hot and lose power. To clean the air filter, you can use a soft brush and some soapy water. Be sure to dry it thoroughly before reinstalling it.
To check it and clean it, you can follow these steps:
- Locate the air filter, usually located near the base of the engine or in the air intake duct.
- Use a screwdriver to remove the air filter cover, being careful not to damage the air filter.
- Inspect the air filter for any dirt or debris that may have accumulated on it.
- Use a soft brush and some soapy water to gently clean the air filter. Be sure to remove all dirt and debris from the filter.
- Once the air filter is clean, use a dry rag to wipe it down, making sure to remove any remaining moisture.
- Reinstall the air filter cover, being sure to secure it tightly.
- Start the engine and check for any issues with airflow or power.
By regularly checking and cleaning the air filter, you can ensure that your weed eater’s engine is getting the right amount of air, which will improve its performance and prolong the life of the engine. It’s also important to check the air filter at the recommended intervals, as specified in your owner’s manual.
Check the spark plug
The spark plug is responsible for igniting the fuel in your weed eater’s engine. If it’s worn out or fouled, your weed eater won’t start or will run poorly. Check the spark plug every 100 hours of use or once a season, and replace it if it’s worn or fouled. A worn spark plug can cause your engine to misfire or not start at all. To replace the spark plug, use a spark plug wrench to remove the old one and install a new one of the same type and heat range.
To check and replace it you can follow these steps:
- Locate the spark plug, usually located near the top of the engine, and use a spark plug wrench to remove it.
- Inspect the spark plug for any signs of wear or fouling, such as a worn electrode or a buildup of carbon.
- If the spark plug is worn or fouled, use a new spark plug of the same type and heat range to replace it.
- Gently thread the new spark plug into the engine, being careful not to cross-thread it.
- Use the spark plug wrench to secure the spark plug and tighten it to the manufacturer’s specifications.
- Start the engine and check for any issues with starting or running.
By regularly checking and replacing the spark plug, you can ensure that your weed eater’s engine is getting the spark it needs to ignite the fuel, which will improve its performance and prolong the life of the engine. It’s also important to check the spark plug at the recommended intervals, as specified in your owner’s manual and to use the correct replacement spark plug.
Check the fuel filter
The fuel filter is responsible for keeping dirt and debris out of your weed eater’s fuel system. Over time, it can get clogged, which can restrict fuel flow and cause your weed eater to run poorly. Check the fuel filter every 100 hours of use or once a season, and clean or replace it as needed. A clogged fuel filter can cause your engine to run poorly and lose power. To check the fuel filter, remove the fuel line from the carburetor and blow through it. If you can’t blow through it easily, it’s clogged and should be replaced.
To check and replace it you can follow these steps:
- Locate the fuel filter, it is usually located either in the fuel tank or in the fuel line, between the tank and the carburetor.
- Using a pair of pliers, gently remove the fuel filter from the fuel line.
- Inspect the fuel filter for any signs of clogging or damage, such as a buildup of dirt or tears in the filter.
- If the fuel filter is clogged or damaged, use a new fuel filter of the same type to replace it.
- Reinstall the fuel filter in the fuel line, making sure it is securely in place.
- Start the engine and check for any issues with fuel flow or performance.
By regularly checking and replacing the fuel filter, you can ensure that your weed eater’s engine is getting the fuel it needs, which will improve its performance and prolong the life of the engine. It’s also important to check the fuel filter at the recommended intervals, as specified in your owner’s manual and to use the correct replacement filter.
Check the fuel lines
The fuel lines are responsible for carrying fuel from the tank to the carburetor. Over time, they can become cracked or clogged, which can restrict fuel flow and cause your weed eater to run poorly. Check the fuel lines every 100 hours of use or once a season, and replace them if they’re damaged or clogged. To check the fuel lines, remove the fuel line from the carburetor and blow through it. If you can’t blow through it easily, it’s clogged and should be replaced. Also, look for any cracks or leaks in the lines, and replace them if you find any.
To check and replace them you can follow these steps:
- Locate the fuel lines, they are usually located between the fuel tank and the carburetor.
- Using a pair of pliers, gently remove the fuel lines from the carburetor.
- Inspect the fuel lines for any signs of cracks, leaks, or clogging.
- If the fuel lines are damaged or clogged, use new fuel lines of the same size and type to replace them.
- Reinstall the new fuel lines, making sure they are securely in place and properly connected to the fuel tank and the carburetor.
- Start the engine and check for any issues with fuel flow or performance.
By regularly checking and replacing the fuel lines, you can ensure that your weed eater’s engine is getting the fuel it needs, which will improve its performance and prolong the life of the engine. It’s also important to check the fuel lines at the recommended intervals, as specified in your owner’s manual and to use the correct replacement lines.
Check the carburetor
The carburetor is responsible for mixing air and fuel in the correct ratio for combustion. If it’s dirty or out of adjustment, your weed eater can run poorly or not start at all. Check the carburetor every 100 hours of use or once a season, and clean or adjust it as needed. To clean the carburetor, remove it from the engine and use a small brush and some carburetor cleaner to remove any built-up dirt and debris. Be sure to pay attention to the jets and make sure they’re not clogged. To adjust the carburetor, refer to your owner’s manual for the correct settings.
To check and adjust it you can follow these steps:
- Locate the carburetor, it is usually located near the top of the engine or near the air filter.
- Use a screwdriver to remove the carburetor cover, being careful not to damage any internal parts.
- Inspect the carburetor for any signs of dirt or debris buildup, as well as any issues with the jets or linkage.
- Use a small brush and some carburetor cleaner to remove any dirt or debris that may have accumulated on the carburetor. Make sure to pay attention to the jets and make sure they’re not clogged.
- Adjust the carburetor as needed, according to the manufacturer’s specifications. This can include adjusting the idle speed, mixture, or air/fuel ratio. Refer to your owner’s manual for the correct settings.
- Reinstall the carburetor cover, being sure to secure it tightly.
- Start the engine and check for any issues with power or performance.
By regularly checking and adjusting the carburetor, you can ensure that your weed eater’s engine is getting the correct mix of air and fuel, which will improve its performance and prolong the life of the engine. It’s also important to check the carburetor at the recommended intervals, as specified in your owner’s manual and to use the correct tools and equipment when working on it.
Check the blades
The blades are responsible for cutting the grass, so it’s important to keep them sharp. Dull blades can cause uneven cuts, damage your lawn, and make your weed eater work harder than it needs to. Check the blades every 25 hours of use or once a season, and sharpen or replace them as needed. To sharpen the blades, use a file or a sharpening stone to keep them in good condition. Be sure to wear protective gloves and eye protection while working on the blades.
To check and sharpen them you can follow these steps:
- Locate the blades, they are usually located at the bottom of the cutting head.
- Use a pair of gloves to protect your hands and a pair of pliers to remove the blades.
- Inspect the blades for any signs of wear or damage, such as nicks, chips or dull edges.
- If the blades are dull or damaged, use a file or sharpening stone to sharpen them. Be sure to wear protective gloves and eye protection while working on the blades.
- Reinstall the blades, making sure they are securely in place and properly aligned.
- Start the engine and check for any issues with cutting performance.
By regularly checking and sharpening the blades, you can ensure that your weed eater cuts grass efficiently and effectively, which will improve its performance and prolong the life of the blades. It’s also important to check the blades at the recommended intervals, as specified in your owner’s manual and to use the correct tools and equipment when working on them.
Check the belts
The belts are responsible for transferring power from the engine to the blades. Over time, they can become stretched or worn, which can cause your weed eater to run poorly or not start at all. Check the belts every 100 hours of use or once a season, and replace them if they’re damaged or worn. To check the belts, remove the cover and inspect them for signs of wear or cracking. Be sure to use the correct replacement belt, as specified in your owner’s manual.
To check and replace them you can follow these steps:
- Locate the belts, they are usually located in the area between the engine and the cutting head.
- Inspect the belts for any signs of wear or damage, such as fraying, cracking, or excessive stretching.
- If the belts are worn or damaged, use new belts of the same size and type to replace them.
- Reinstall the new belts, making sure they are securely in place and properly aligned.
- Start the engine and check for any issues with power transfer or performance.
By regularly checking and replacing the belts, you can ensure that your weed eater’s cutting head is getting the power it needs, which will improve its performance and prolong the life of the belts. It’s also important to check the belts at the recommended intervals, as specified in your owner’s manual and to use the correct replacement belts.
Store it properly
Once you’ve finished using your weed eater for the day or season, it’s important to store it properly. This means cleaning it, as mentioned in step 1, and then storing it in a dry, protected area. Exposure to moisture and extreme temperatures can damage your weed eater and make it harder to start the next time you use it. Be sure to empty the fuel tank and run the engine until it stalls to prevent stale fuel from gumming up the carburetor.
Here’s how you can store your weed eater properly:
- Clean the weed eater thoroughly, as previously explained in point 1.
- Drain the fuel tank and run the engine until it stops, this will prevent stale fuel from gumming up the carburetor.
- Store the weed eater in a dry, protected area, such as a shed or garage. Avoid storing it outside, where it can be exposed to the elements.
- If you’re storing your weed eater for an extended period, cover it with a protective cover or tarp to protect it from dust and debris.
By properly storing your weed eater, you can protect it from the elements and prevent damage from moisture or extreme temperatures. This will help to prolong its life and ensure that it’s ready to use when you need it.
By following these simple maintenance steps, you can ensure that your weed eater will run at peak performance for years to come. And trust me, your lawn will thank you. Regular maintenance of your weed eater is essential for optimal performance. It not only saves you time and money but also prolongs the lifespan of your machine. A well-maintained weed eater also helps to keep your lawn looking neat and tidy. Remember to keep it clean, change the oil, check the air filter, spark plug, fuel filter, fuel lines, carburetor, blades, belts and store it properly.
Happy trimming!