A stuck pull cord on a lawn mower can be caused by debris, damaged or worn components, or lack of lubrication. To fix it, safely troubleshoot the issue, perform regular maintenance, and use the pull cord correctly.
Reasons for a Stuck Lawn Mower Pull Cord
A stuck pull cord on a lawn mower can be a frustrating issue. There are several reasons why this might happen:
- Debris and obstructions: Dirt, grass clippings, or other debris might be caught in the pull cord mechanism, causing it to stick.
- Recoil starter assembly issues: The recoil starter assembly consists of a spring, pulley, and rope. If any of these components are damaged or misaligned, the pull cord may become stuck.
- Worn or damaged pull cord: Over time, the pull cord can fray, weaken, or break, causing it to get stuck or become difficult to pull.
- Lack of lubrication: If the pull cord mechanism and other moving parts aren’t adequately lubricated, they may not move smoothly, resulting in a stuck pull cord.
How to Safely Troubleshoot a Stuck Pull Cord
To troubleshoot a stuck pull cord, follow these steps:
- Disconnect the spark plug wire: This ensures that the mower will not accidentally start while you’re working on it.
- Remove the starter housing: Unscrew and remove the starter housing to access the pull cord mechanism.
- Inspect the pull cord: Check for any visible damage, fraying, or knots in the cord. If the cord is damaged, it may need to be replaced.
- Check for debris and obstructions: Look for dirt, grass clippings, or other debris that may be causing the pull cord to stick. Remove any obstructions.
- Inspect the recoil starter assembly: Make sure the spring, pulley, and rope are in good condition and properly aligned.
- Lubricate the mechanism: Apply a light lubricant to the moving parts of the pull cord mechanism to ensure smooth operation.
- Reassemble the starter housing: Once you’ve addressed the issue, reassemble the starter housing and reconnect the spark plug wire.
Table 1: Troubleshooting a Stuck Pull Cord
| Step | Action |
|---|---|
| 1 | Disconnect the spark plug wire |
| 2 | Remove the starter housing |
| 3 | Inspect the pull cord |
| 4 | Check for debris and obstructions |
| 5 | Inspect the recoil starter assembly |
| 6 | Lubricate the mechanism |
| 7 | Reassemble the starter housing |
Remember to always disconnect the spark plug wire for safety when troubleshooting your lawn mower pull cord.
Checking for Debris and Obstructions in the Pull Cord System
If your lawn mower’s pull cord is stuck, debris and obstructions could be the culprits. To inspect and clean the pull cord system, follow these steps:
- Disconnect the spark plug wire: Always disconnect the spark plug wire to prevent accidental starts while working on the mower.
- Remove the starter housing: Unscrew and remove the starter housing to access the pull cord mechanism.
- Inspect for debris: Carefully inspect the pull cord, pulley, and surrounding areas for dirt, grass clippings, or other debris. Use a brush or cloth to gently remove any debris.
- Check the pulley and spring: Ensure the pulley and spring are functioning properly and are free of obstructions. If necessary, clean and lubricate these components.
- Reassemble the starter housing: Once you’ve cleared any obstructions and cleaned the pull cord system, reassemble the starter housing and reconnect the spark plug wire.
Regularly cleaning your lawn mower, especially after heavy use, can help prevent debris-related pull cord issues.
Inspecting the Lawn Mower Recoil Starter Assembly
The recoil starter assembly is a crucial component of the pull cord system. If it’s damaged or misaligned, the pull cord may become stuck. To inspect and repair the recoil starter assembly, follow these steps:
- Disconnect the spark plug wire: Ensure the mower is off and the spark plug wire is disconnected.
- Remove the starter housing: Unscrew and remove the starter housing to access the recoil starter assembly.
- Inspect the components: Check the spring, pulley, and rope for any signs of damage or wear. If any parts are damaged, they will need to be replaced.
- Check the alignment: Ensure the spring, pulley, and rope are properly aligned and functioning smoothly. If necessary, adjust or repair the components.
- Lubricate the assembly: Apply a light lubricant to the moving parts of the recoil starter assembly to ensure smooth operation.
- Reassemble the starter housing: Once you’ve addressed any issues with the recoil starter assembly, reassemble the starter housing and reconnect the spark plug wire.
Table 2: Inspecting the Recoil Starter Assembly
| Step | Action |
|---|---|
| 1 | Disconnect the spark plug wire |
| 2 | Remove the starter housing |
| 3 | Inspect the components |
| 4 | Check the alignment |
| 5 | Lubricate the assembly |
| 6 | Reassemble the starter housing |
Regularly inspect and maintain the recoil starter assembly to ensure a smooth and functional lawn mower pull cord.
Lubricating and Maintaining the Pull Cord Mechanism
Lubricating the pull cord mechanism can help prevent it from getting stuck and prolong its lifespan. Here’s how to lubricate and maintain the pull cord mechanism:
- Disconnect the spark plug wire: Always disconnect the spark plug wire before working on your lawn mower.
- Remove the starter housing: Unscrew and remove the starter housing to access the pull cord mechanism.
- Clean the components: Use a brush or cloth to clean any dirt or debris from the pull cord, pulley, and spring.
- Lubricate the mechanism: Apply a light, non-greasy lubricant to the moving parts of the pull cord mechanism, such as the pulley and spring. Avoid using heavy grease, as it can attract dirt and cause the mechanism to stick.
- Inspect for wear or damage: While lubricating the mechanism, check for signs of wear or damage. Replace any damaged components as needed.
- Reassemble the starter housing: After lubricating and inspecting the pull cord mechanism, reassemble the starter housing and reconnect the spark plug wire.
Tip: Lubricate the pull cord mechanism at least once a season or as recommended by your lawn mower’s manufacturer.
Replacing a Damaged or Worn Pull Cord
If the pull cord on your lawn mower is damaged, frayed, or worn out, it’s time to replace it. Follow these steps to replace the pull cord:
- Disconnect the spark plug wire: Make sure the mower is off and the spark plug wire is disconnected.
- Remove the starter housing: Unscrew and remove the starter housing to access the pull cord mechanism.
- Remove the old pull cord: Cut the old pull cord and carefully remove it from the pulley.
- Attach the new pull cord: Thread the new pull cord through the hole in the pulley and tie a knot to secure it. Slowly wind the pulley to take up the slack in the cord.
- Reassemble the starter housing: After replacing the pull cord, reassemble the starter housing and reconnect the spark plug wire.
- Test the new pull cord: Gently pull the new cord to ensure it’s functioning properly and has enough tension.
Table 3: Replacing a Damaged or Worn Pull Cord
| Step | Action |
|---|---|
| 1 | Disconnect the spark plug wire |
| 2 | Remove the starter housing |
| 3 | Remove the old pull cord |
| 4 | Attach the new pull cord |
| 5 | Reassemble the starter housing |
| 6 | Test the new pull cord |
Regularly inspect your pull cord for signs of wear or damage, and replace it as needed to ensure smooth operation.
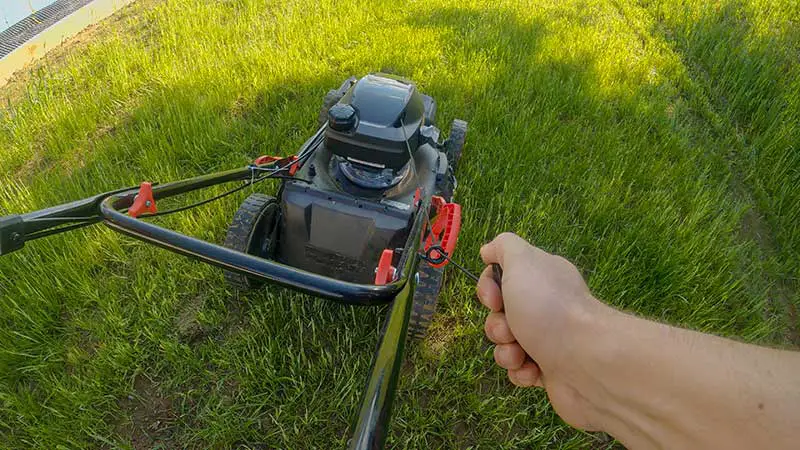
Tips for Properly Using a Lawn Mower Pull Cord
Using the pull cord correctly can help prevent it from getting stuck and minimize the risk of damage. Keep the following tips in mind when using your lawn mower’s pull cord:
- Grasp the handle firmly: Hold the pull cord handle with a firm grip to ensure even and consistent force when pulling.
- Pull the cord out smoothly: When starting the lawn mower, pull the cord out in a smooth, controlled motion. Avoid jerking or yanking the cord, as this can cause damage or wear over time.
- Hold the mower handle down: Keep one hand on the mower handle while pulling the cord to stabilize the mower and reduce the risk of injury.
- Allow the cord to retract slowly: After pulling the cord, allow it to retract slowly and smoothly back into the starter housing. Do not let go of the handle abruptly, as this can cause the cord to snap back and potentially damage the mechanism.
Remember: Proper use of the pull cord can help prevent issues and prolong the life of your lawn mower’s starting mechanism.
Preventing Pull Cord Issues Through Regular Maintenance
Regular maintenance can help prevent pull cord issues and keep your lawn mower functioning smoothly. Follow these maintenance tips to minimize pull cord problems:
- Check the pull cord regularly: Inspect the pull cord for signs of wear, fraying, or damage during routine maintenance. Replace the pull cord as needed.
- Clean and lubricate the mechanism: Clean the pull cord mechanism and apply a light lubricant to the moving parts as part of your regular maintenance routine.
- Keep the mower clean: Remove grass clippings, leaves, and other debris from your mower after each use to prevent build-up that can interfere with the pull cord mechanism.
- Store the mower properly: Store your lawn mower in a cool, dry place when not in use to protect the pull cord and other components from moisture and temperature fluctuations.
Table 4: Preventing Pull Cord Issues Through Regular Maintenance
| Tip | Action |
|---|---|
| 1 | Check the pull cord regularly |
| 2 | Clean and lubricate the mechanism |
| 3 | Keep the mower clean |
| 4 | Store the mower properly |
Maintaining your lawn mower regularly can help prevent pull cord issues and ensure a longer lifespan for your equipment.
When to Consult a Professional for Pull Cord Problems
If you’ve tried troubleshooting and addressing potential issues but your pull cord is still stuck or malfunctioning, it might be time to consult a professional. Here are some scenarios when professional help is recommended:
- Complex repairs: If your mower’s pull cord issue involves a broken recoil starter assembly or other complex repairs, it’s best to leave it to a professional to avoid causing further damage.
- Safety concerns: If you’re unsure about how to safely troubleshoot or repair your mower’s pull cord, consult a professional to prevent potential injury or damage.
- Warranty considerations: If your lawn mower is still under warranty, attempting DIY repairs might void the warranty. Contact the manufacturer or an authorized service center for assistance.
Ensuring a Smooth and Functional Lawn Mower Pull Cord
By understanding the potential causes of a stuck pull cord and following the tips and maintenance steps provided in this article, you can keep your lawn mower’s pull cord running smoothly. Regular maintenance, proper use, and timely repairs can help prevent pull cord issues and prolong the life of your lawn mower.
Key Takeaways
- A stuck pull cord can be caused by debris, damaged or worn components, or lack of lubrication.
- Safely troubleshoot the issue by disconnecting the spark plug and checking for obstructions or damage.
- Regular maintenance and proper use can help prevent pull cord issues and ensure a smoothly functioning lawn mower.
Conclusion
The pull cord on a lawn mower can become stuck due to various reasons such as debris, damaged components, or lack of lubrication. Troubleshooting the issue safely, performing regular maintenance, and using the pull cord correctly can help prevent problems and keep your lawn mower functioning optimally.